Step 1. Add a new site
To create a site, start by clicking Add site in the top left corner of the screen.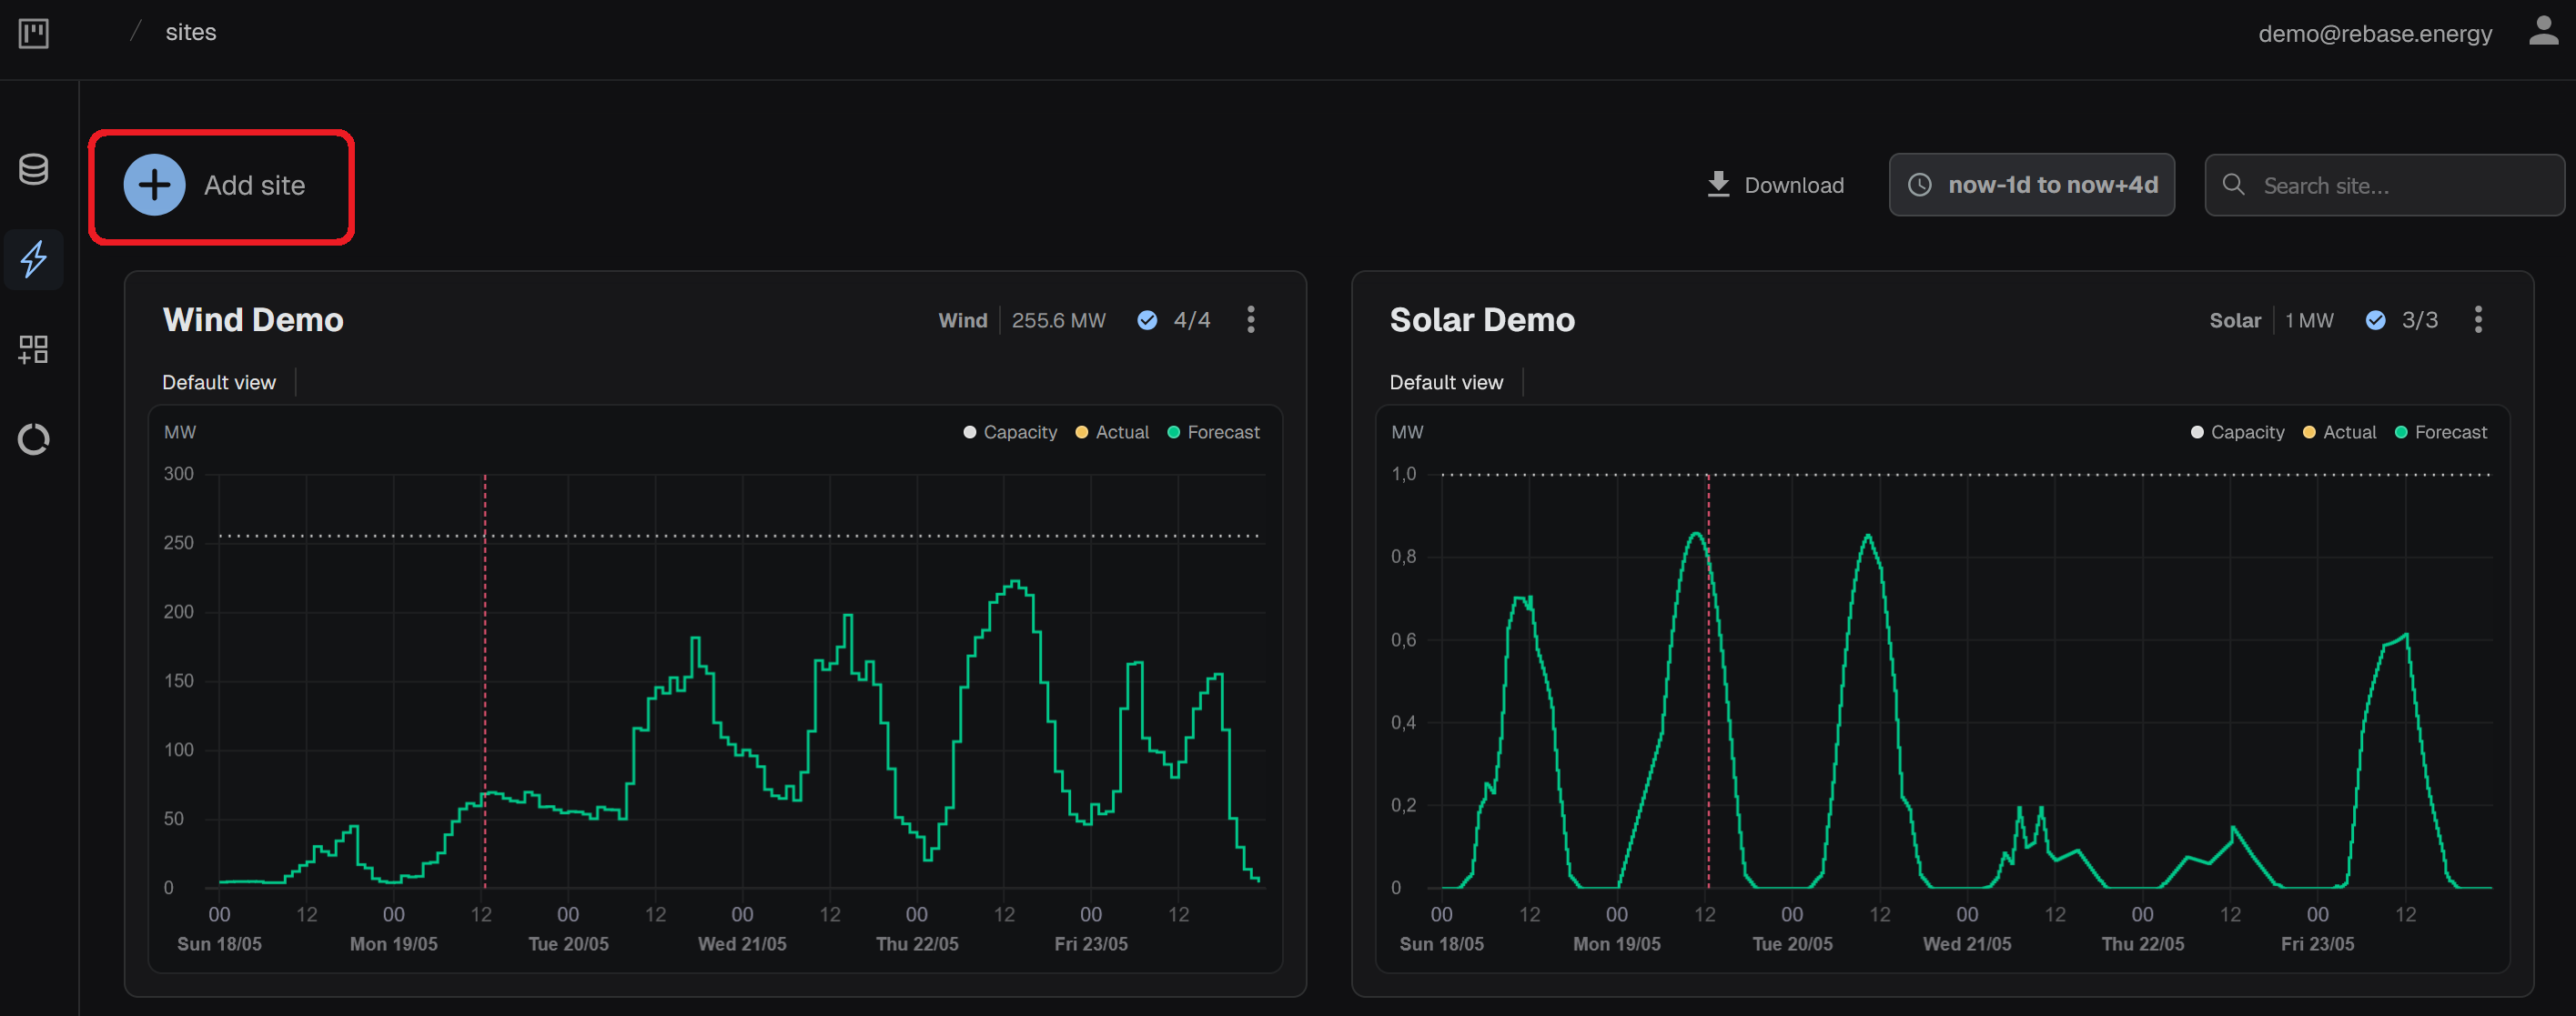
Step 2. Choose the type of the site
In the following page, choose the type of the new site. Currently, three (3) site types are supported: Solar Power, Wind Power and Electricity Demand.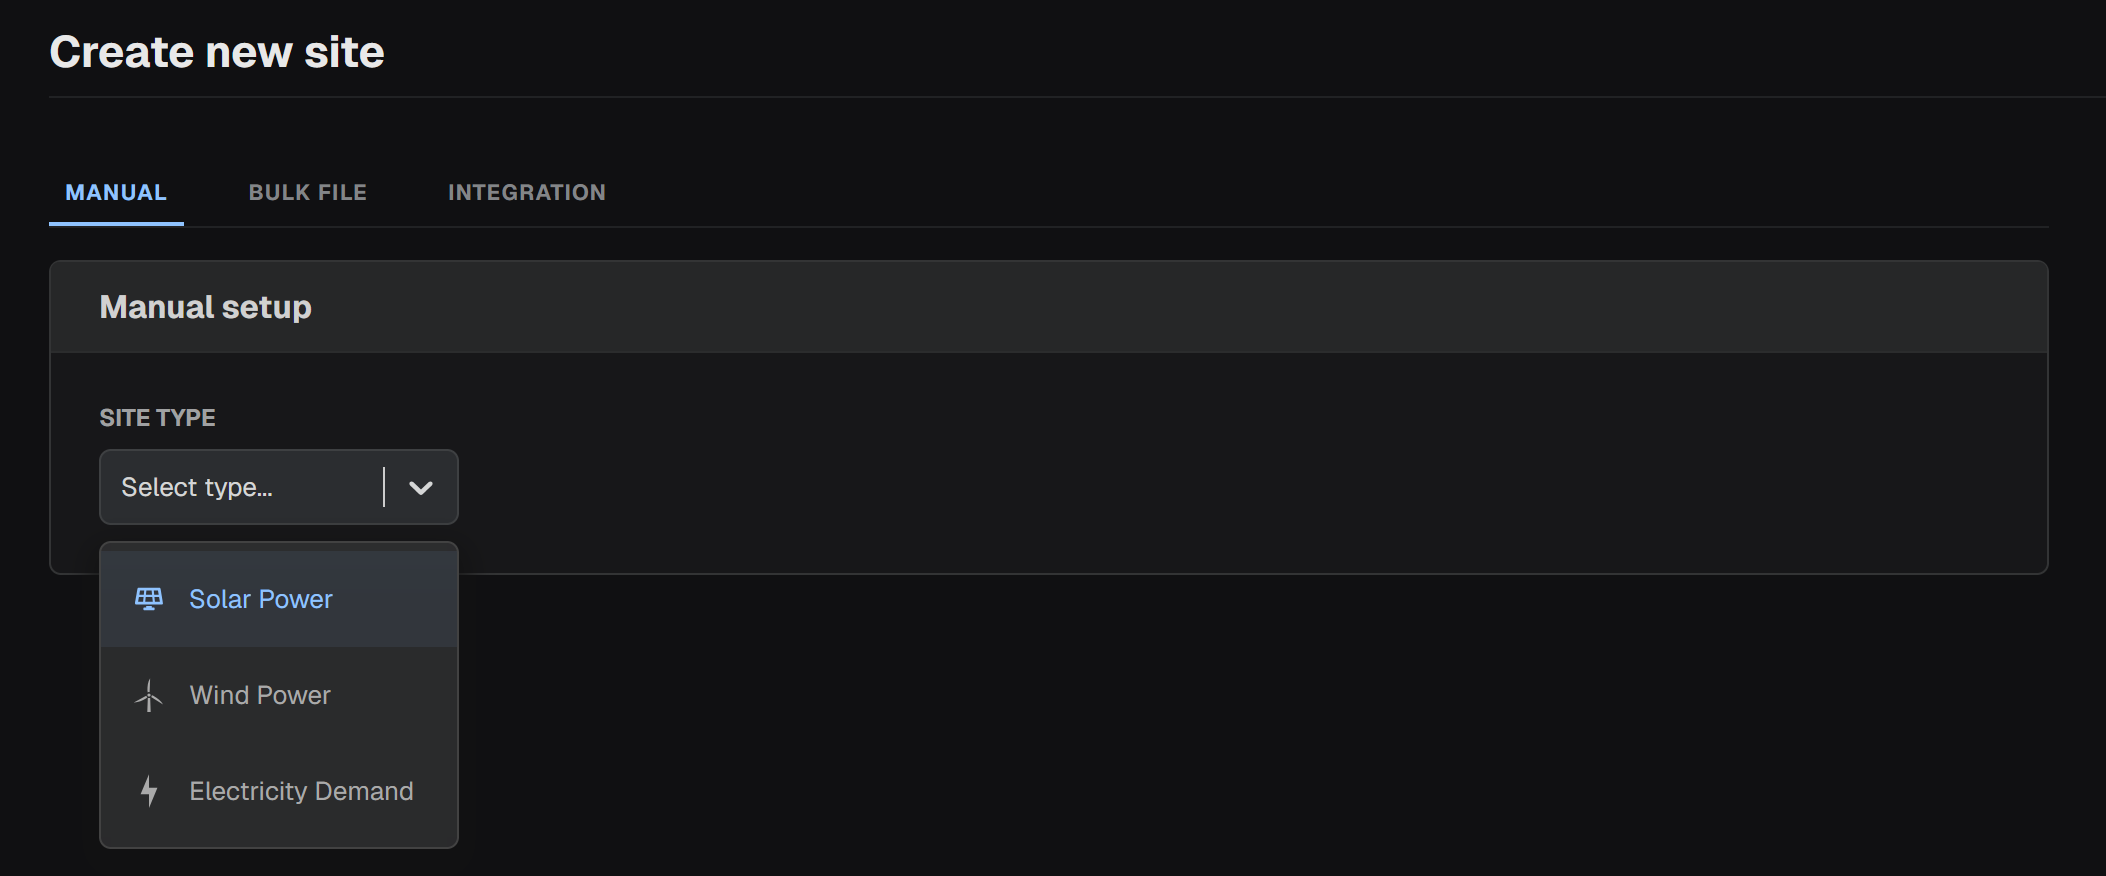
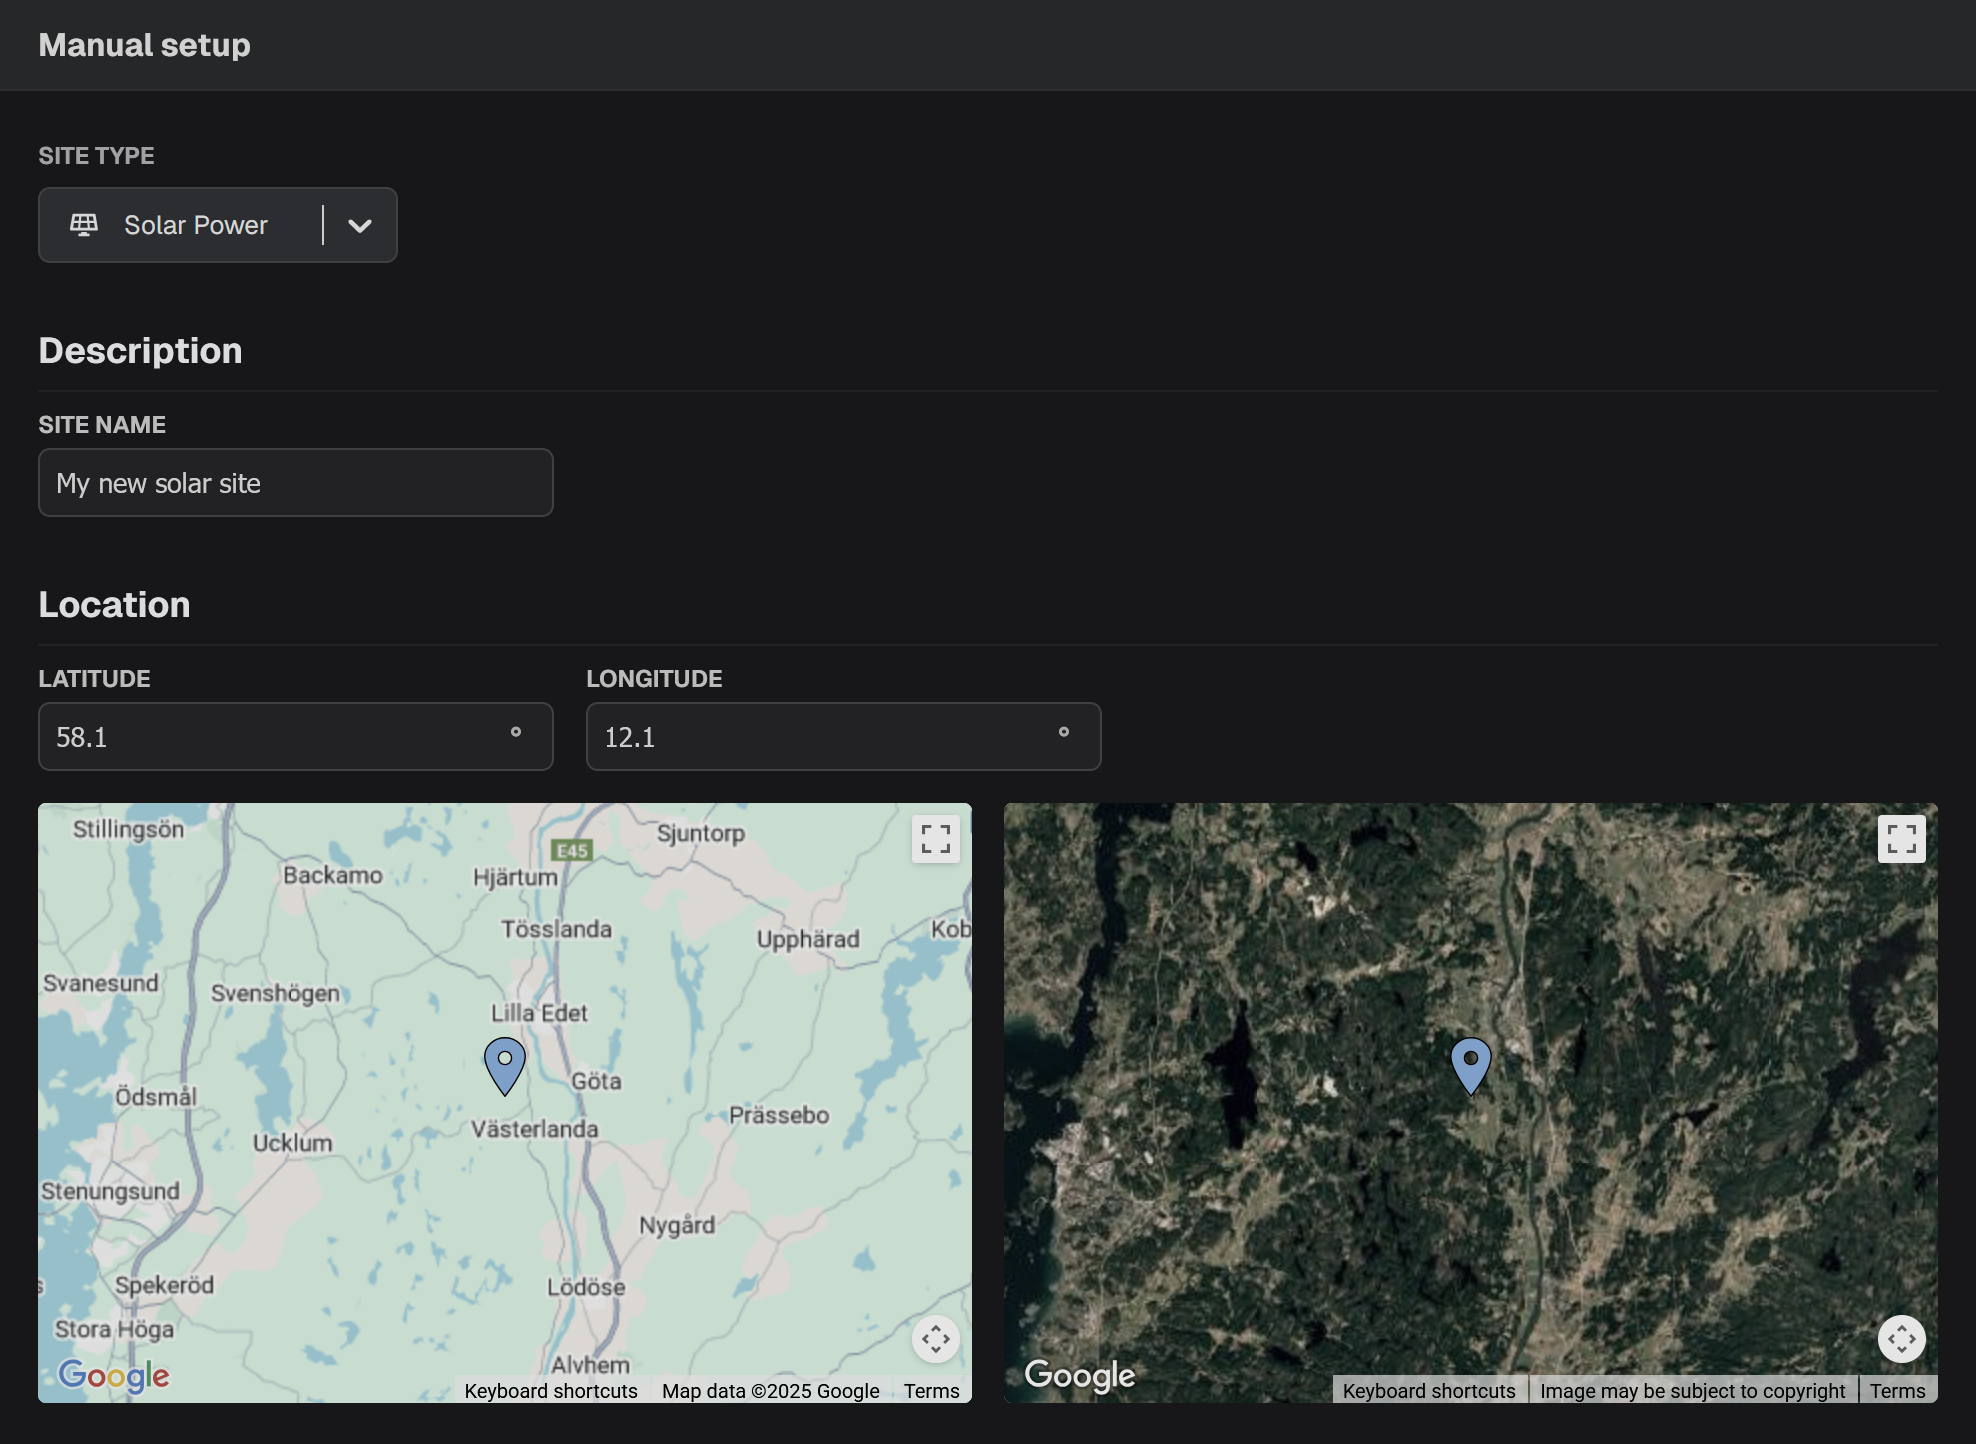
Step 3. Configure the site
Depending on your choice of the site type, the configuration will be different. Choose the site type you want to configure in the tabs below.- Solar Power
- Wind Power
- Electricity Demand
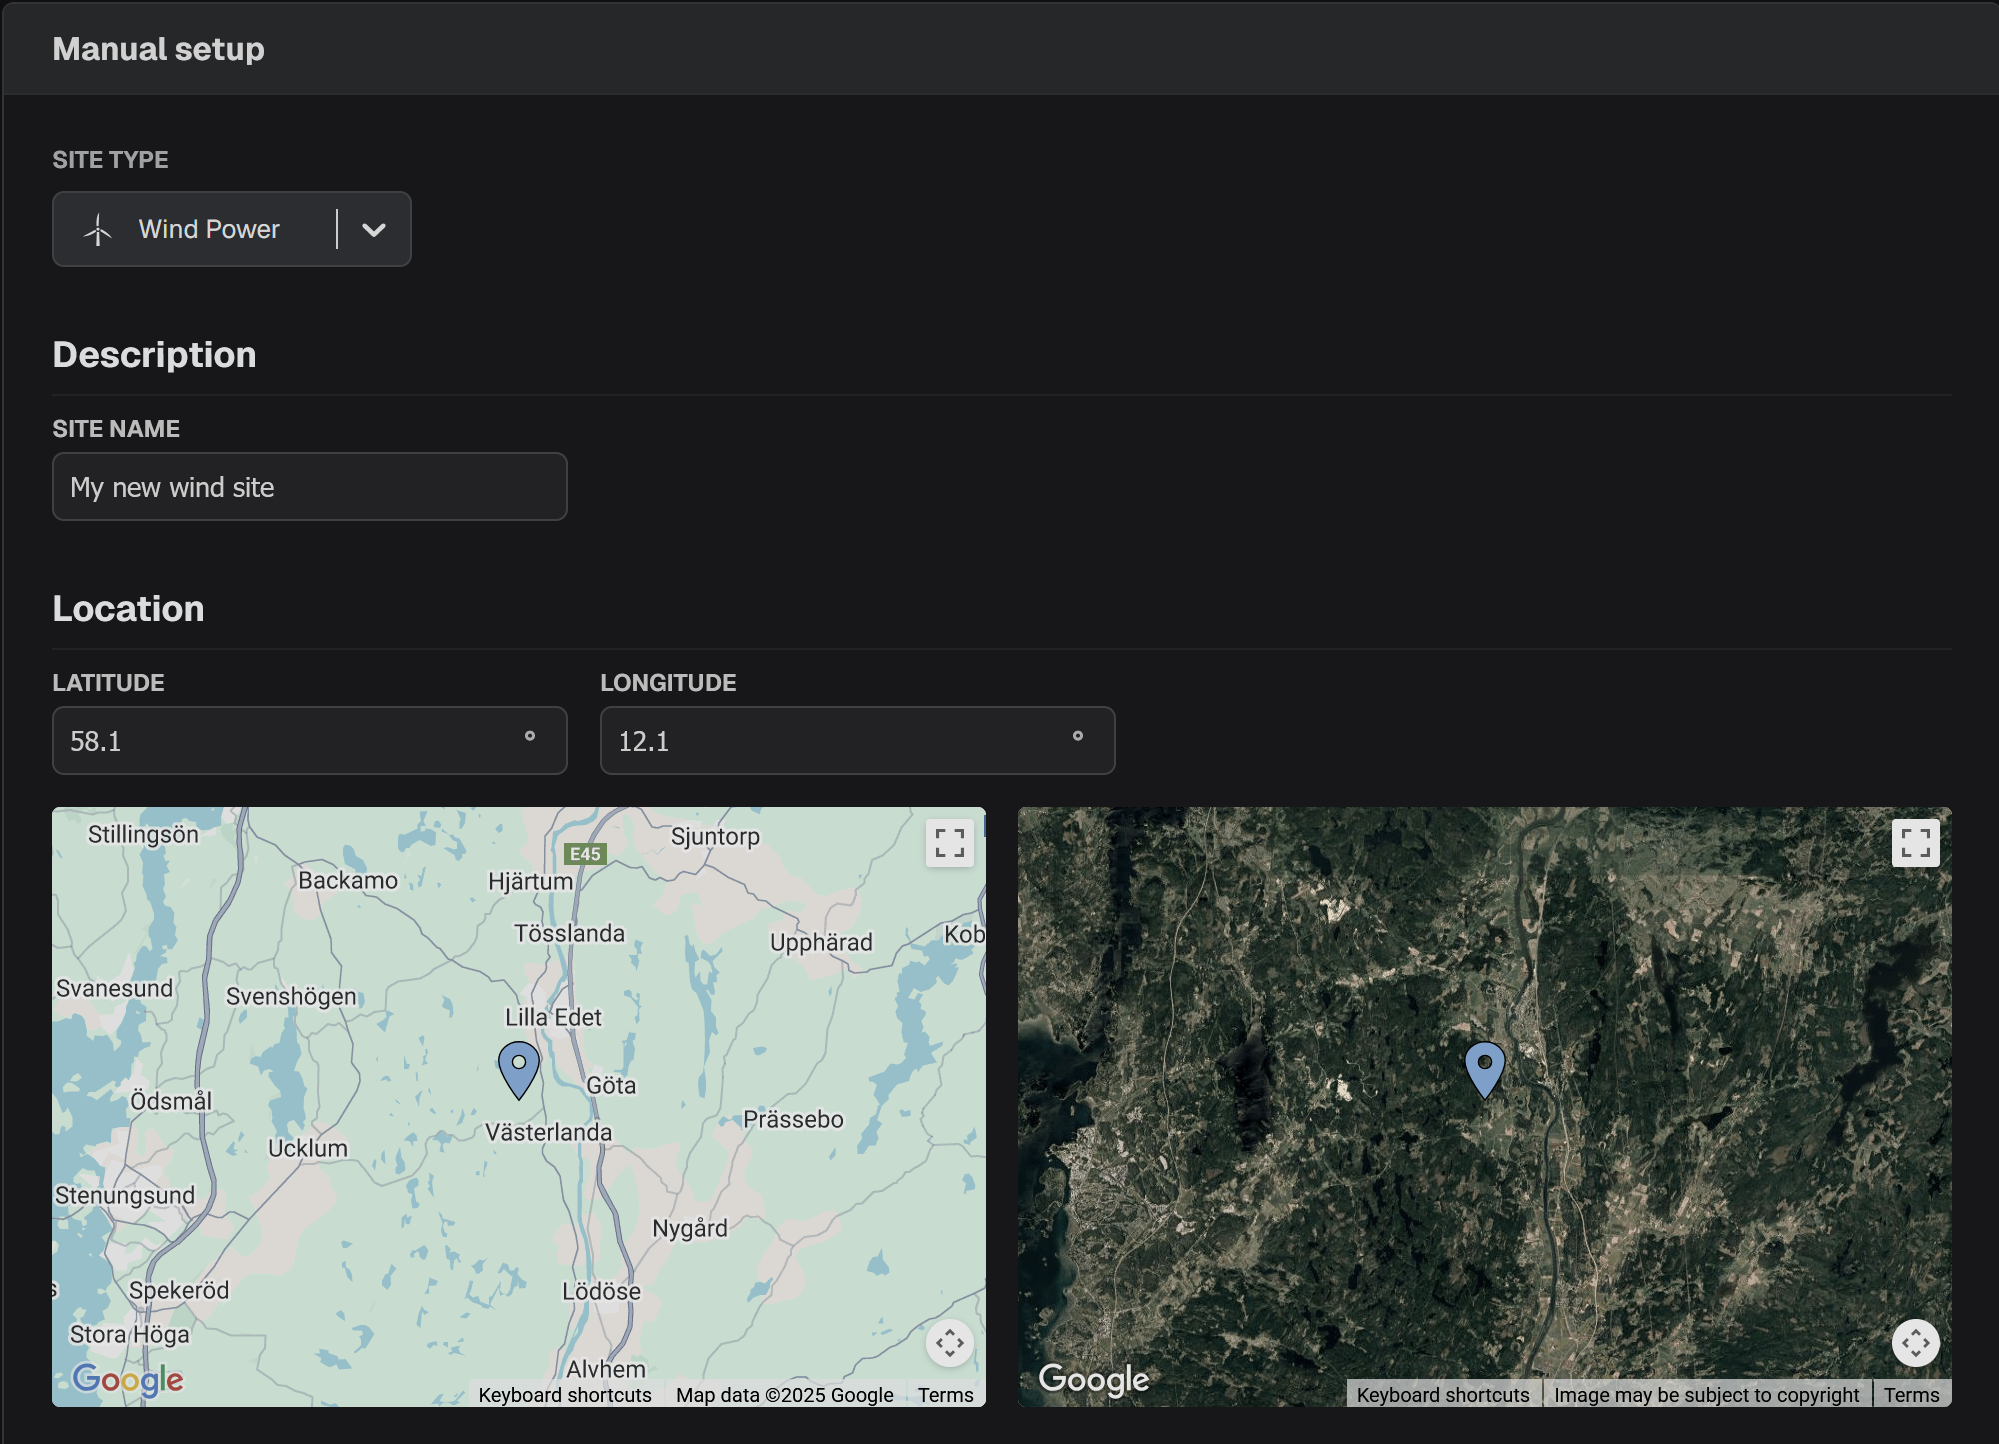
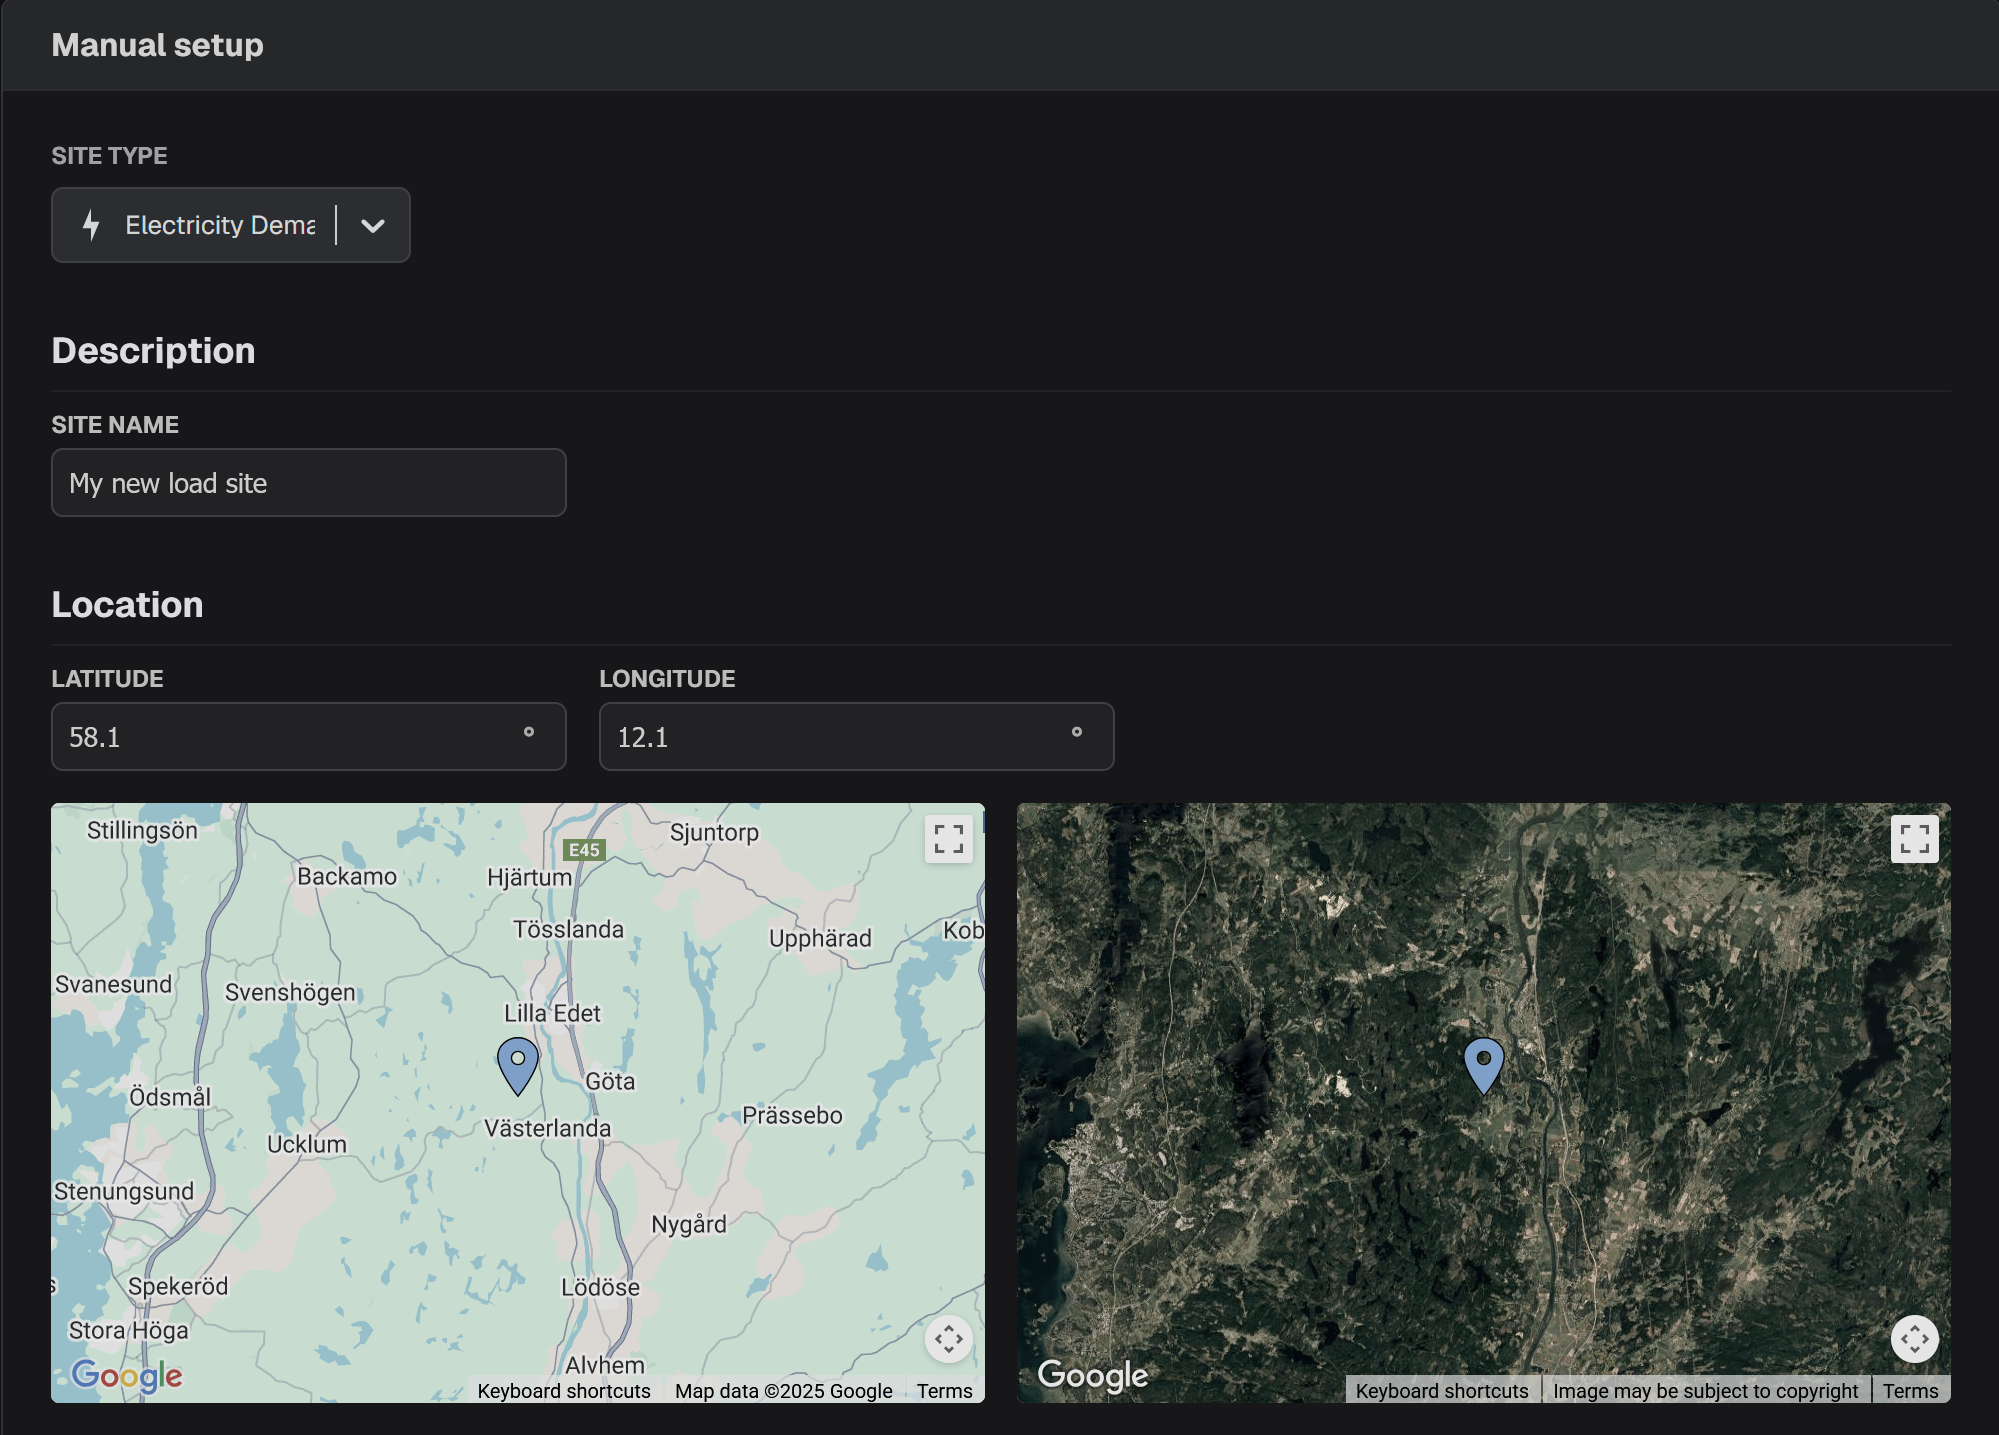
Set name and location
Set PV system parameters
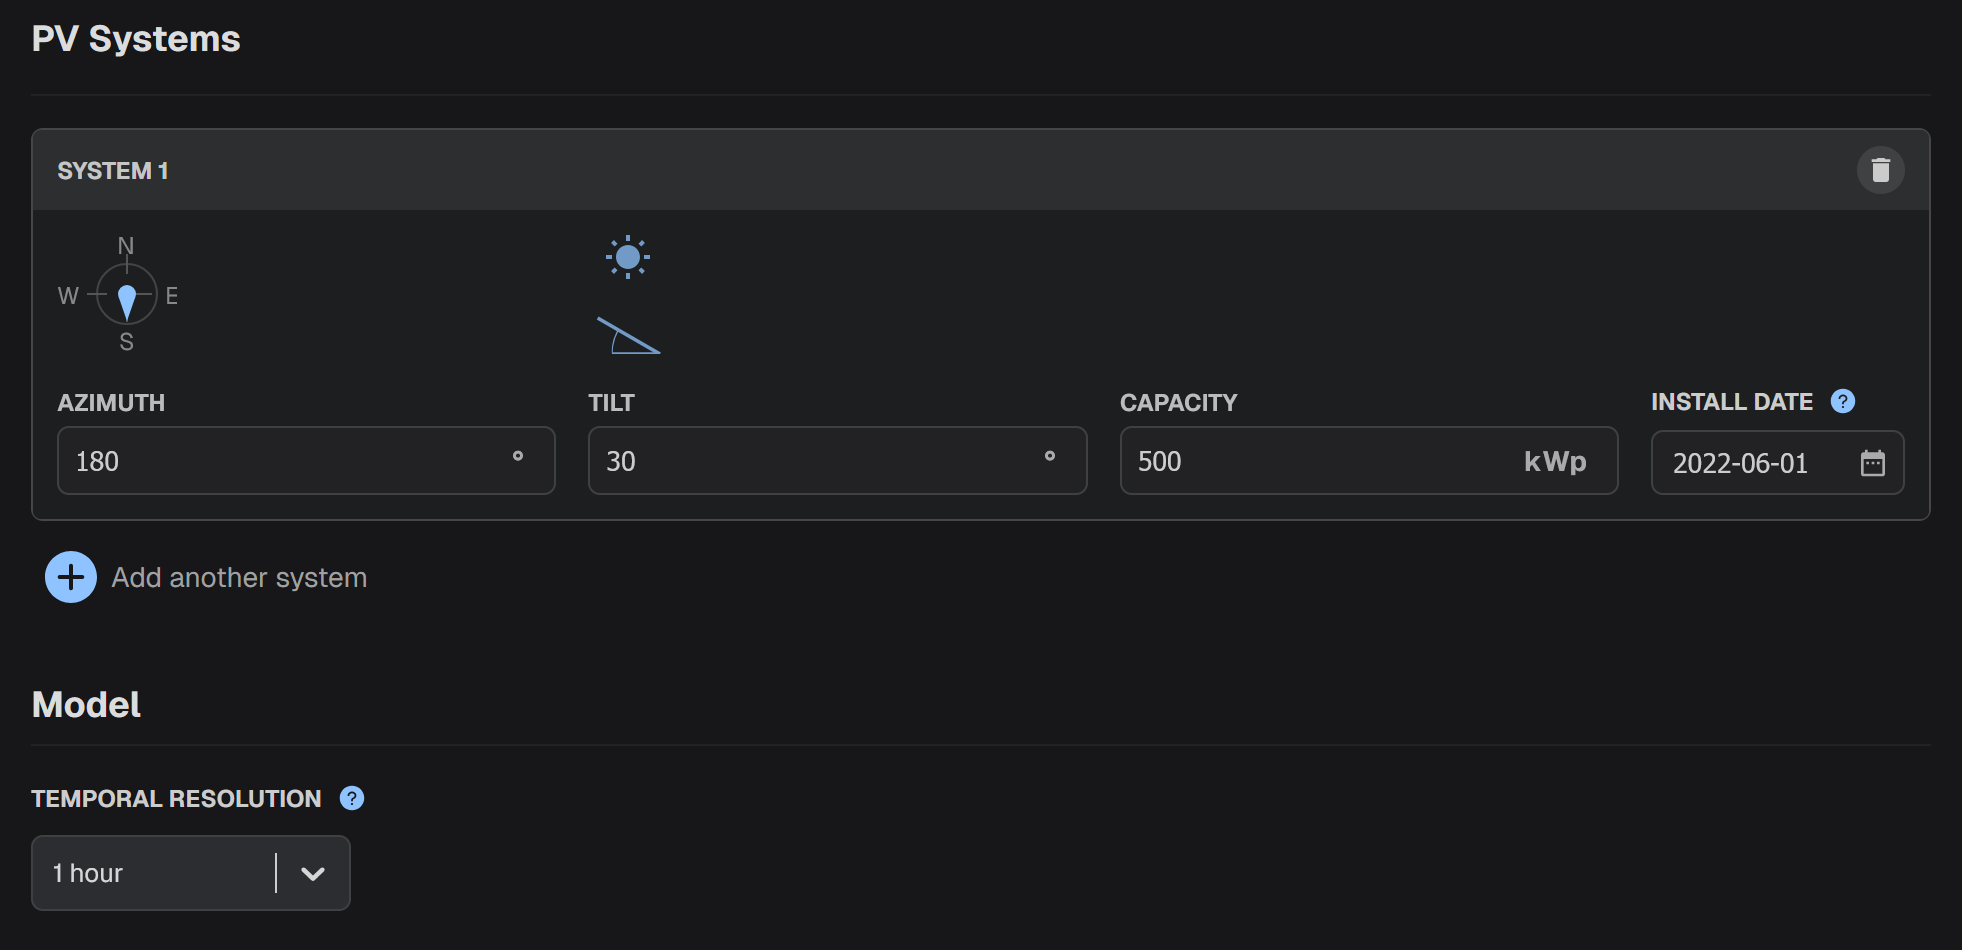
- Azimuth: the orientation of the PV panels. It should be in degree values between 0 and 360 (0-North, 90-East, 180-South, 270-West).
- Tilt: the inclination of the PV panels. It should be in degree values between 0 and 90 (0-parallel, 90-perpendicular to ground).
- Capacity: the capacity of the solar park in kilowatts (kW).
- Install date: the date when the system was installed.
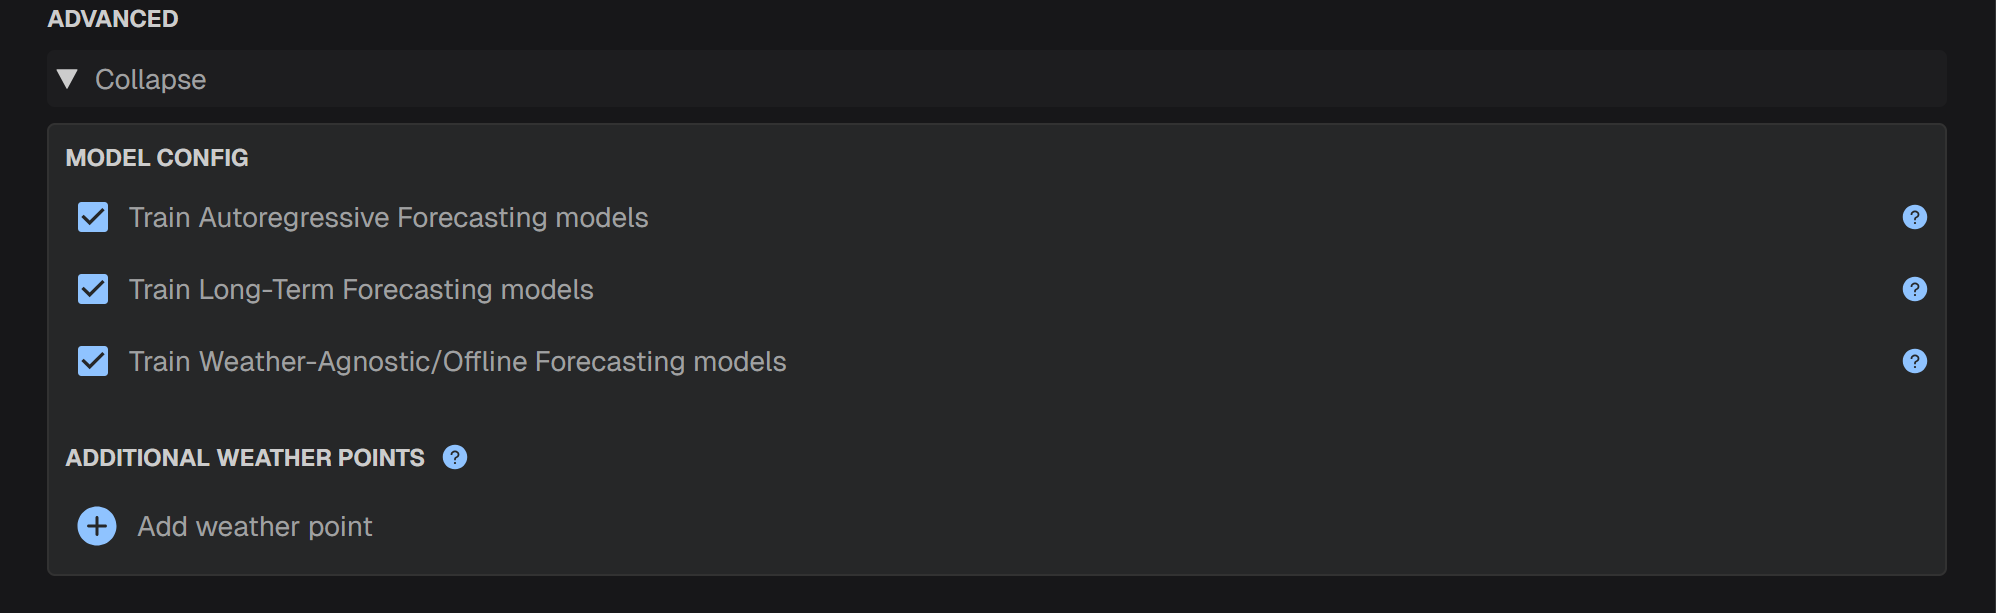
Advanced settings
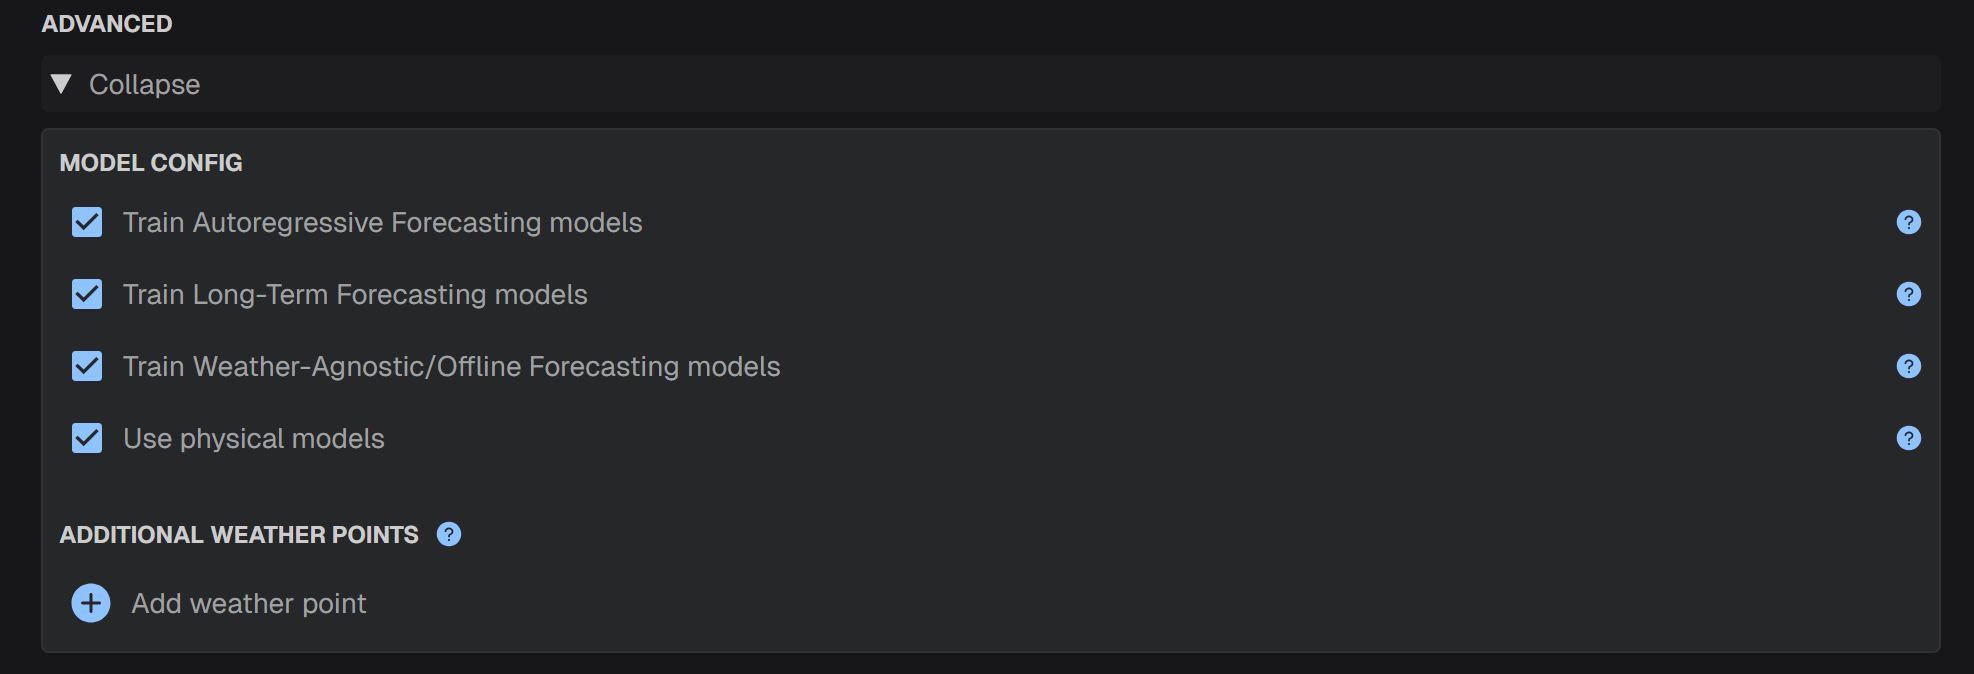
- Train Autoregressive Forecasting models: If checked, a model based on recent power observations will be trained for short-term forecasting. Power observations should be available in real time.
- Train Long-Term Forecasting models: If checked, a model based on typical meteorological year will be trained for long-term forecasting.
- Train Weather-Agnostic/Offline Forecasting models: If checked, a model that does not include any weather features will be trained.
- Use physical models: If checked, physical forecasting models will be deployed. No training data are required for physical models to work.
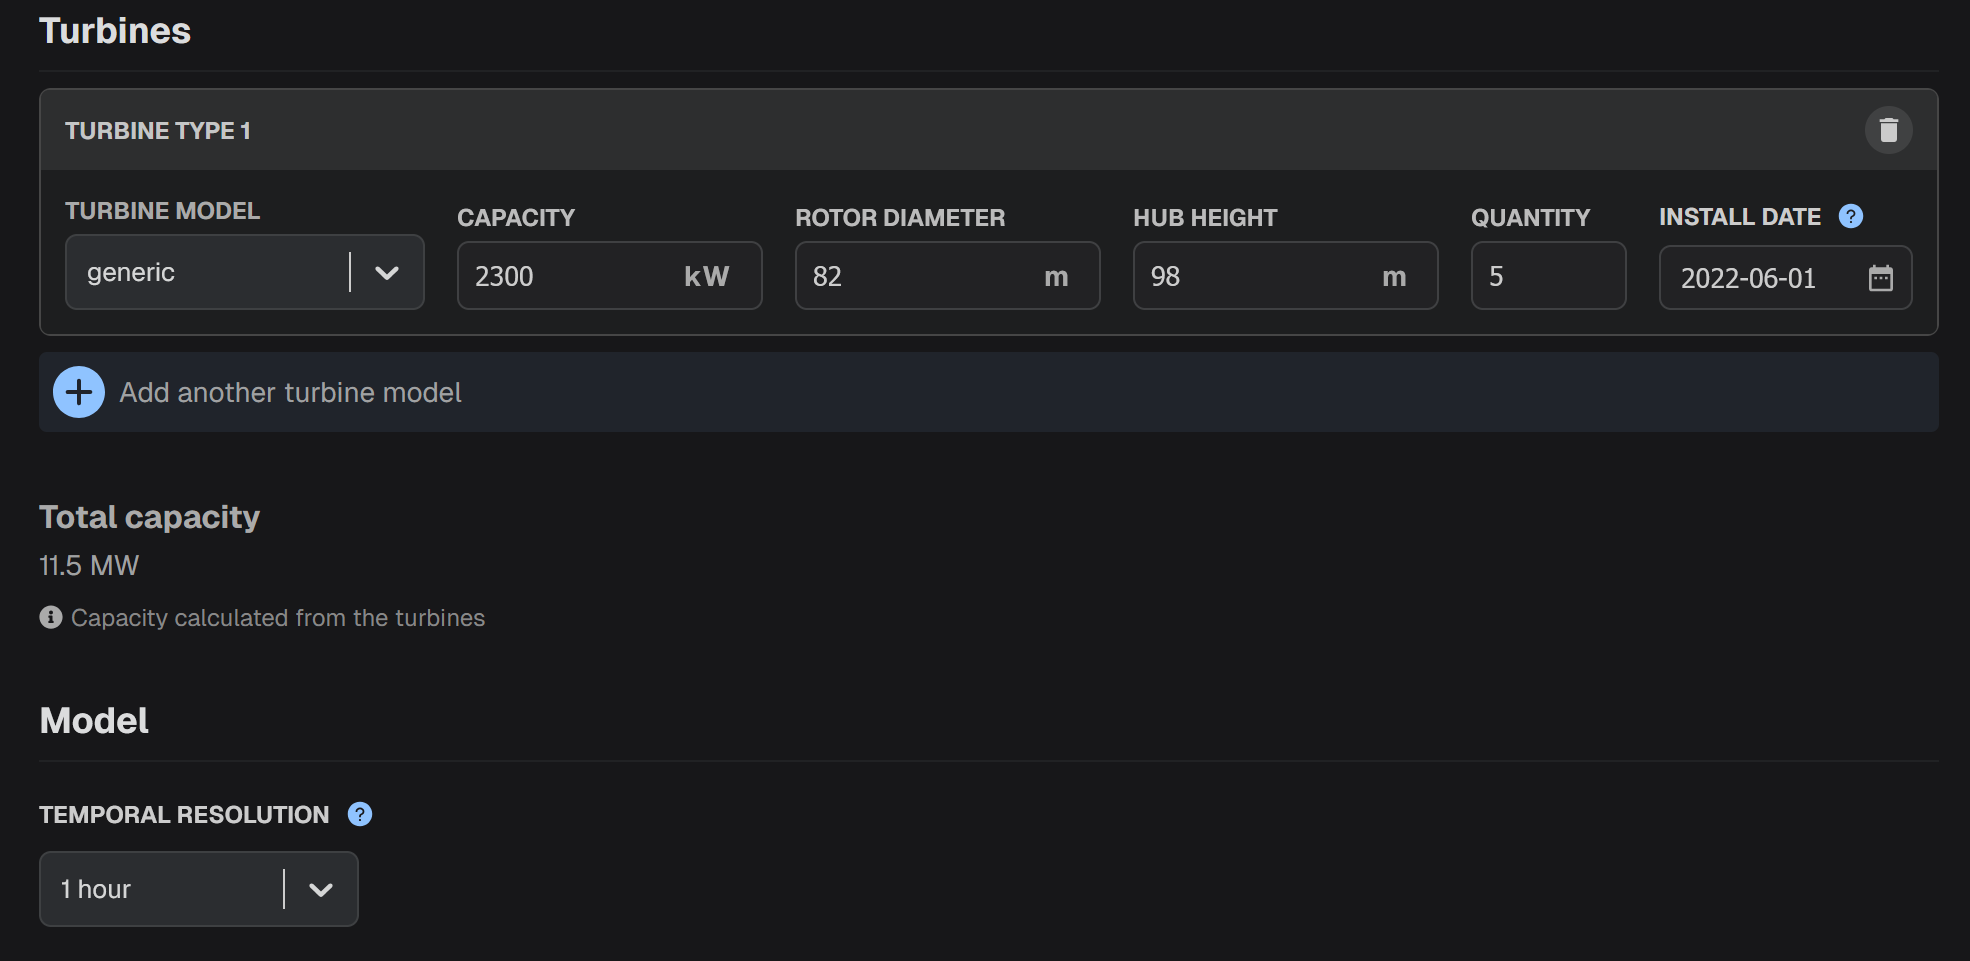


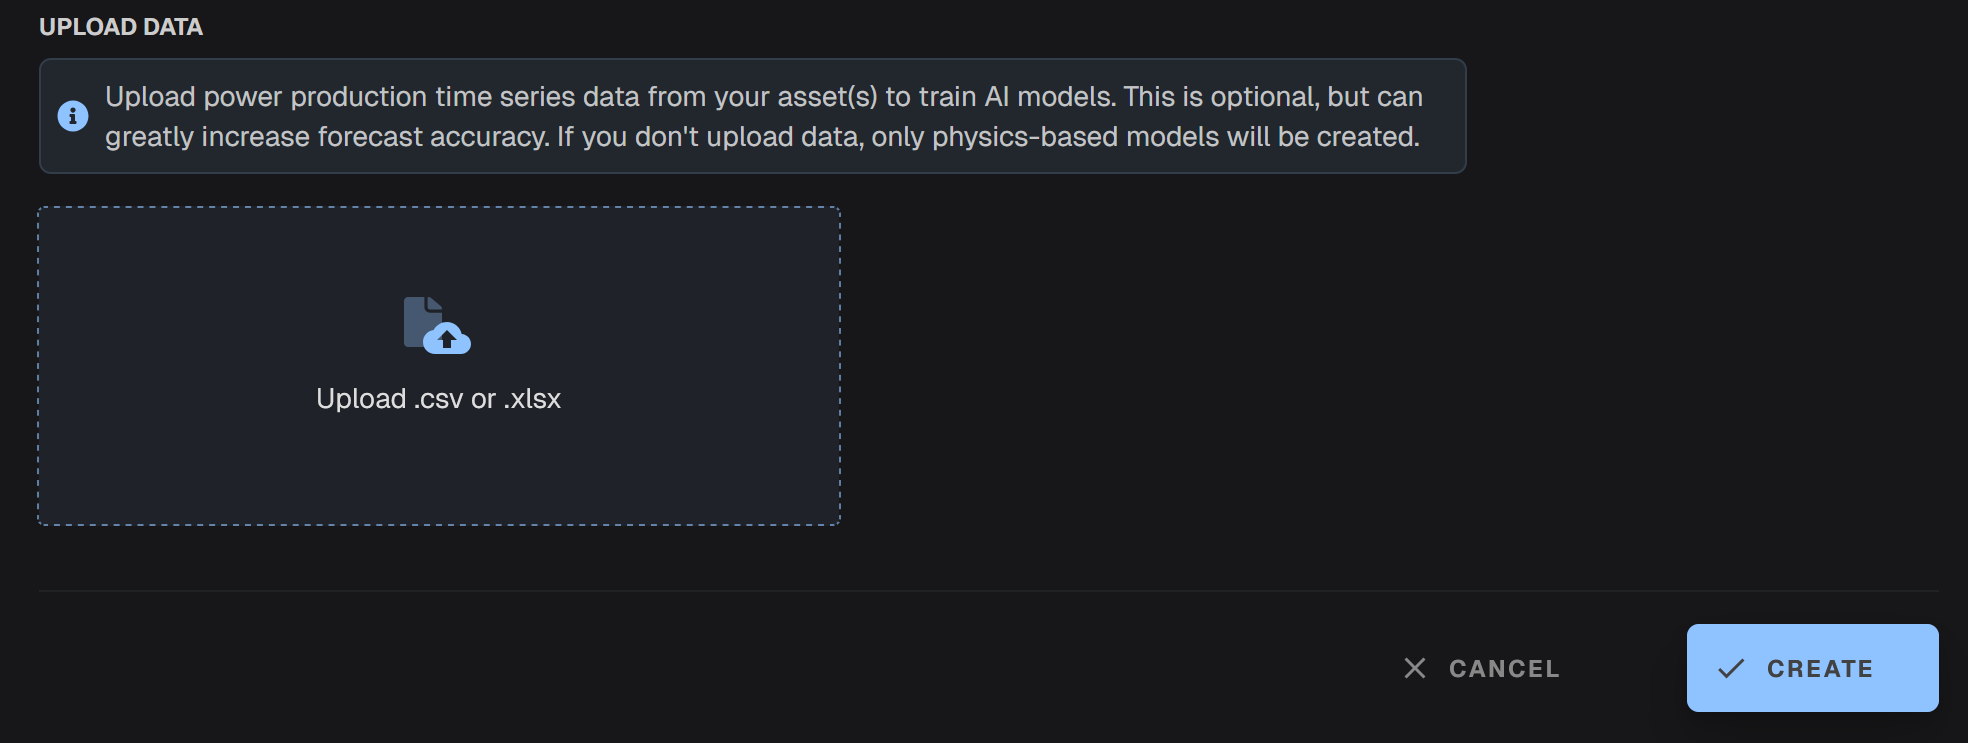
Step 4. Upload power measurements
Upload historical generation or demand data to train ML models. For wind or solar sites this is an optional step. If no power generation data are uploaded, then only physical models can be deployed. For better performance of the ML models, the power measurements are recommended to have hourly or sub-hourly resolution. The platform accepts csv or xlsx files. Find templates.