> ## Documentation Index
> Fetch the complete documentation index at: https://docs.rebase.energy/llms.txt
> Use this file to discover all available pages before exploring further.
# How to create new sites
> Create a new site to forecast in the Rebase Platform.
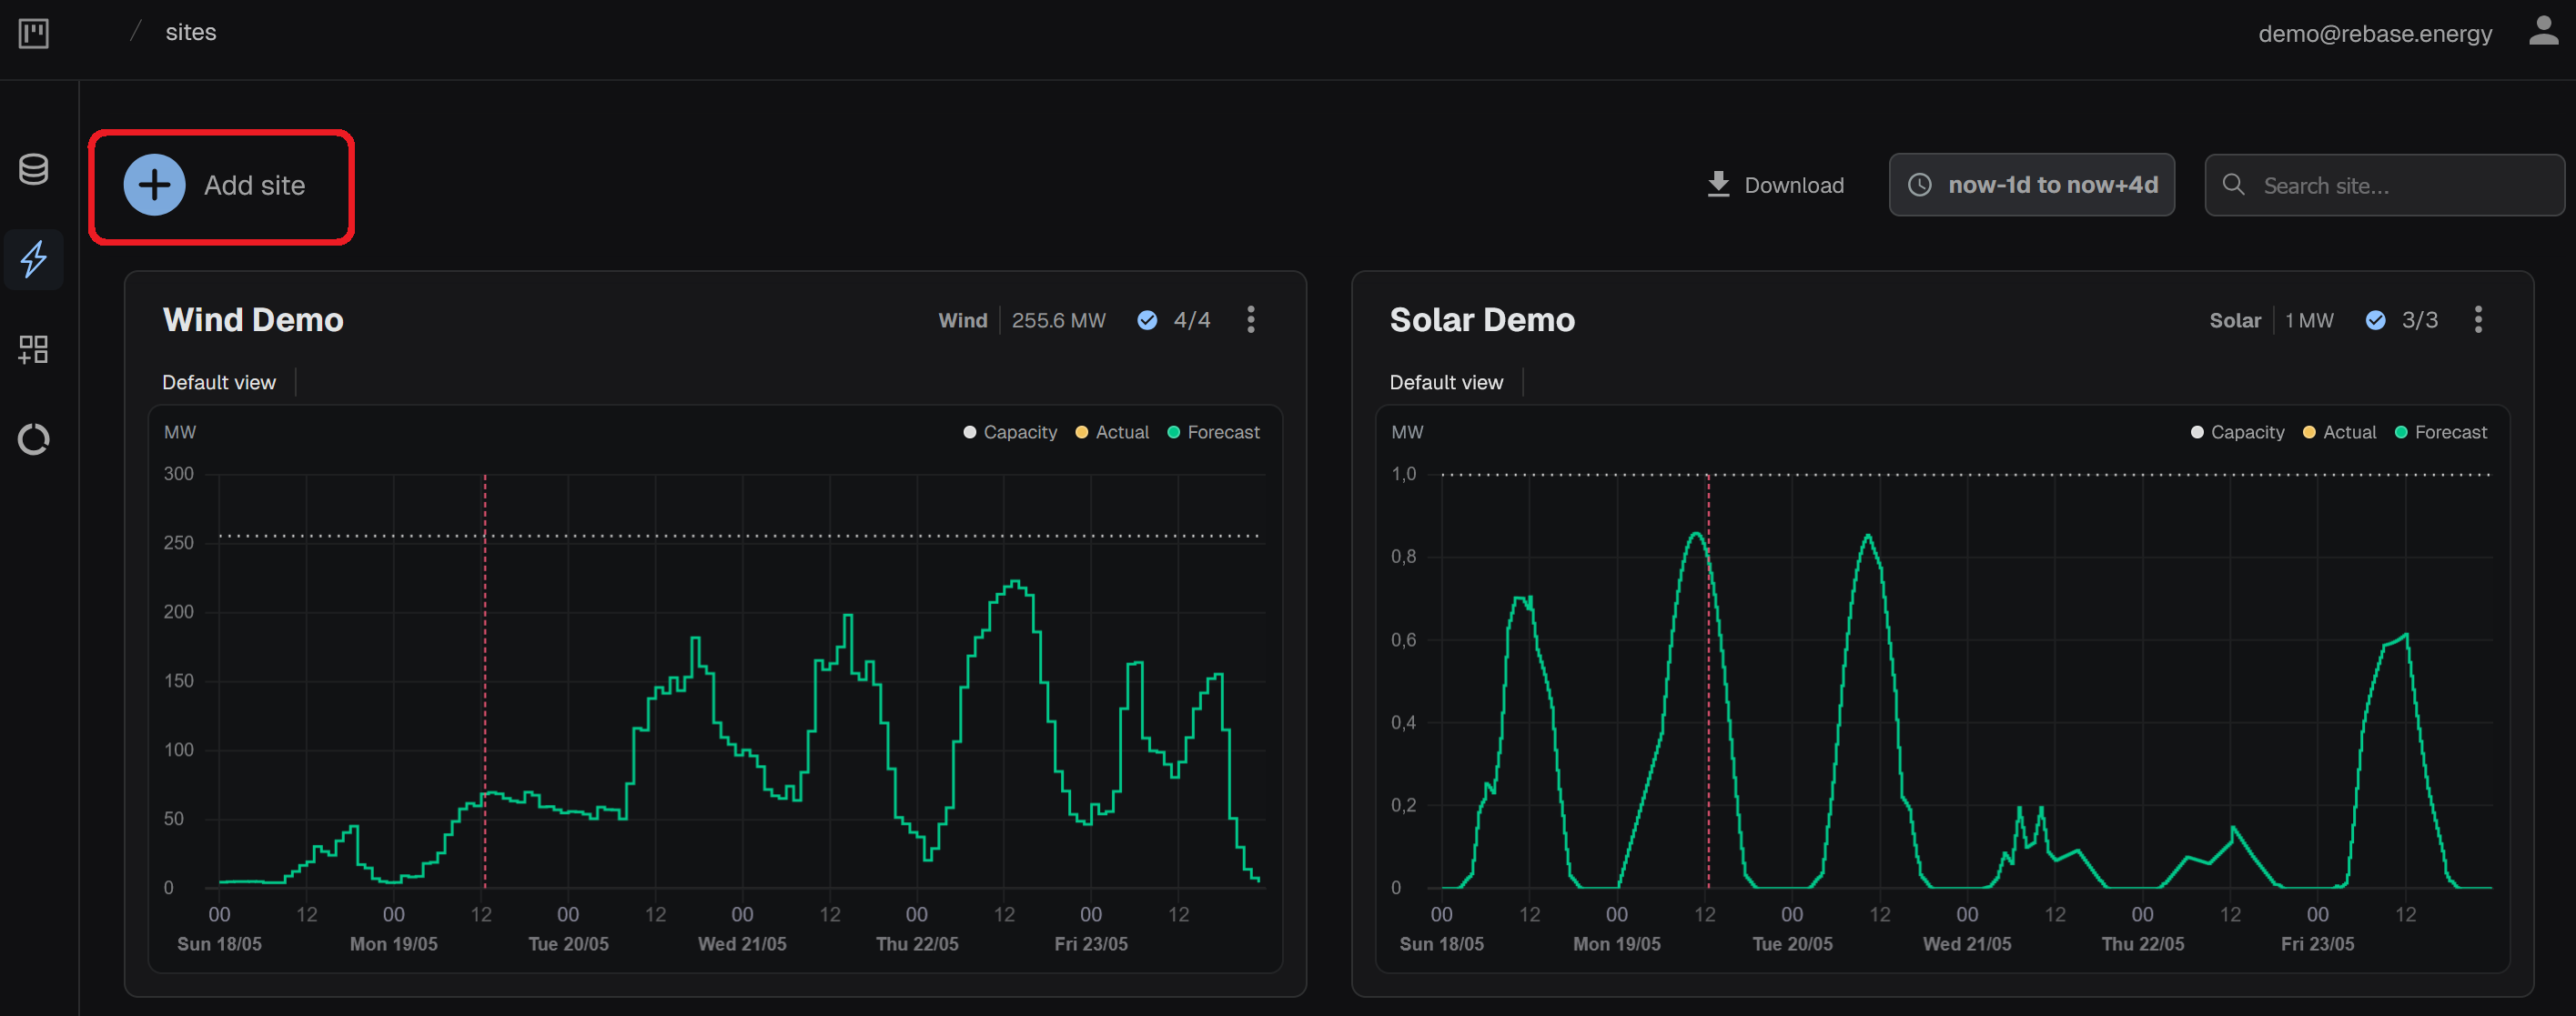
### Step 1. Add a new site
To create a site, start by clicking **Add site** in the top left corner of the screen.
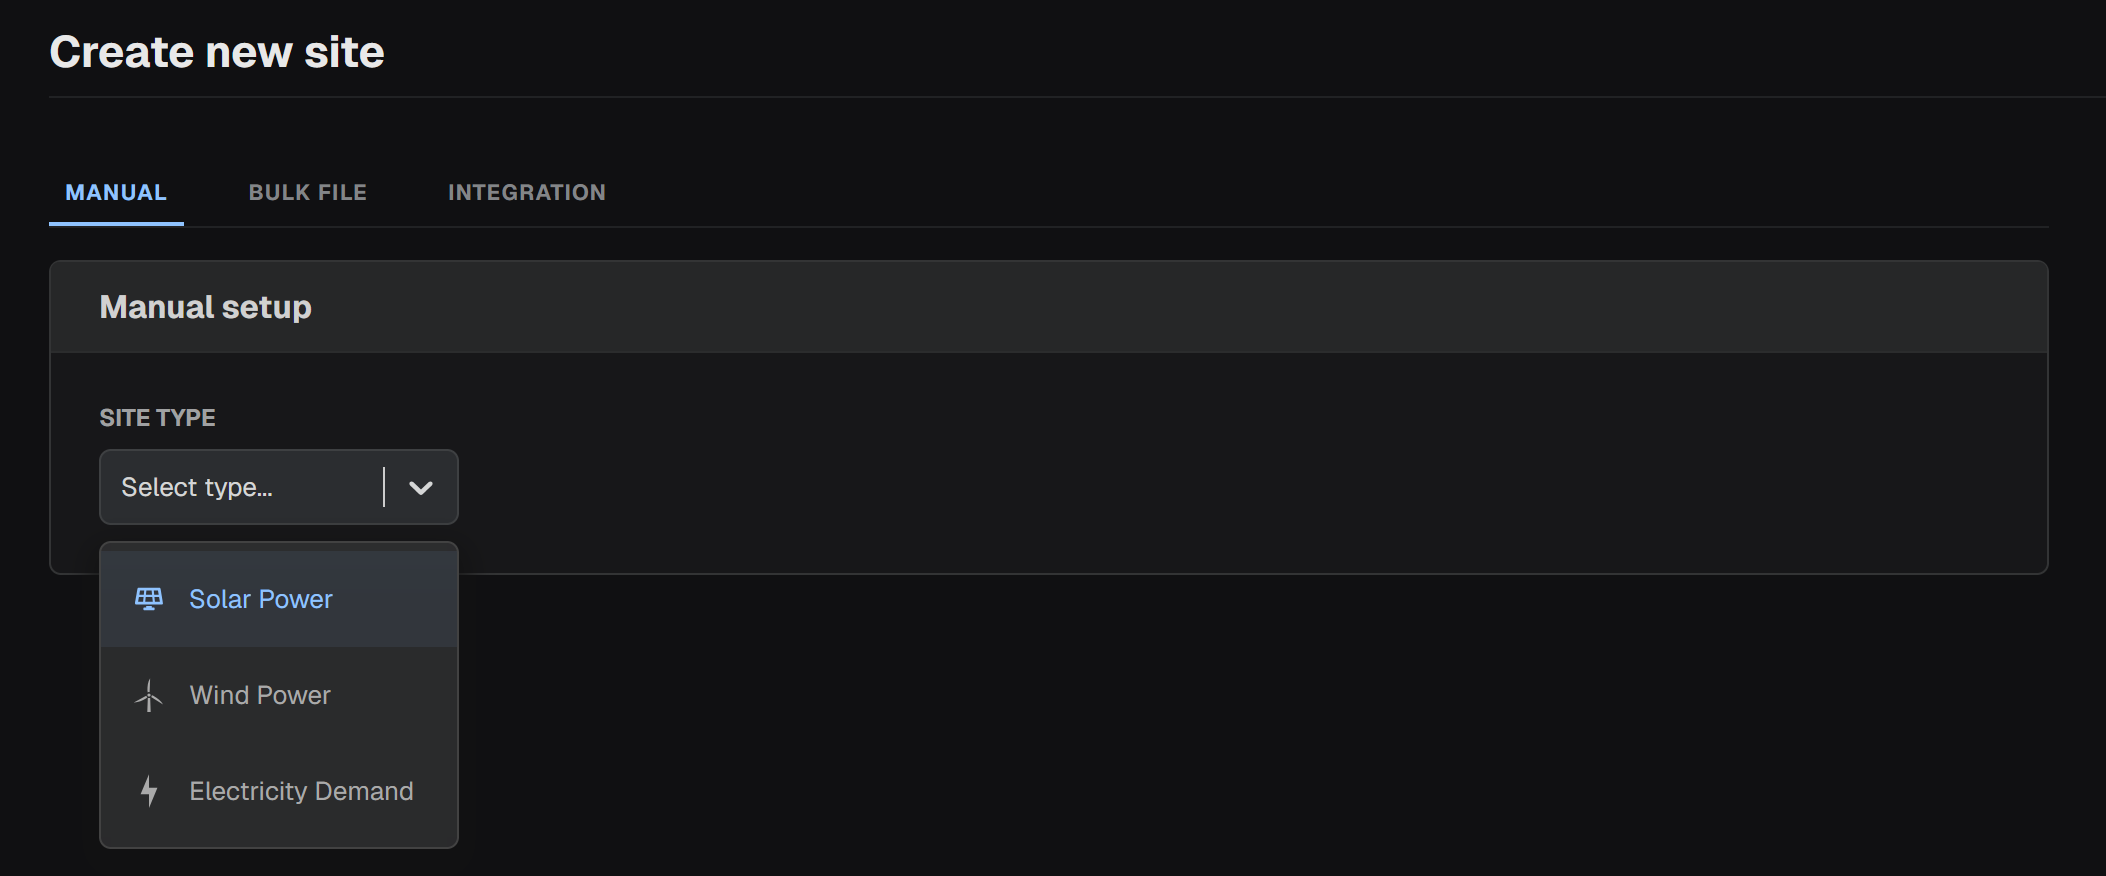
 ### Step 2. Choose the type of the site
In the following page, choose the type of the new site. Currently, three (3) site types are supported: **Solar Power**, **Wind Power** and **Electricity Demand**.
### Step 2. Choose the type of the site
In the following page, choose the type of the new site. Currently, three (3) site types are supported: **Solar Power**, **Wind Power** and **Electricity Demand**.
 ### Step 3. Configure the site
Depending on your choice of the site type, the configuration will be different.
Choose the site type you want to configure in the tabs below.
#### Set name and location
### Step 3. Configure the site
Depending on your choice of the site type, the configuration will be different.
Choose the site type you want to configure in the tabs below.
#### Set name and location
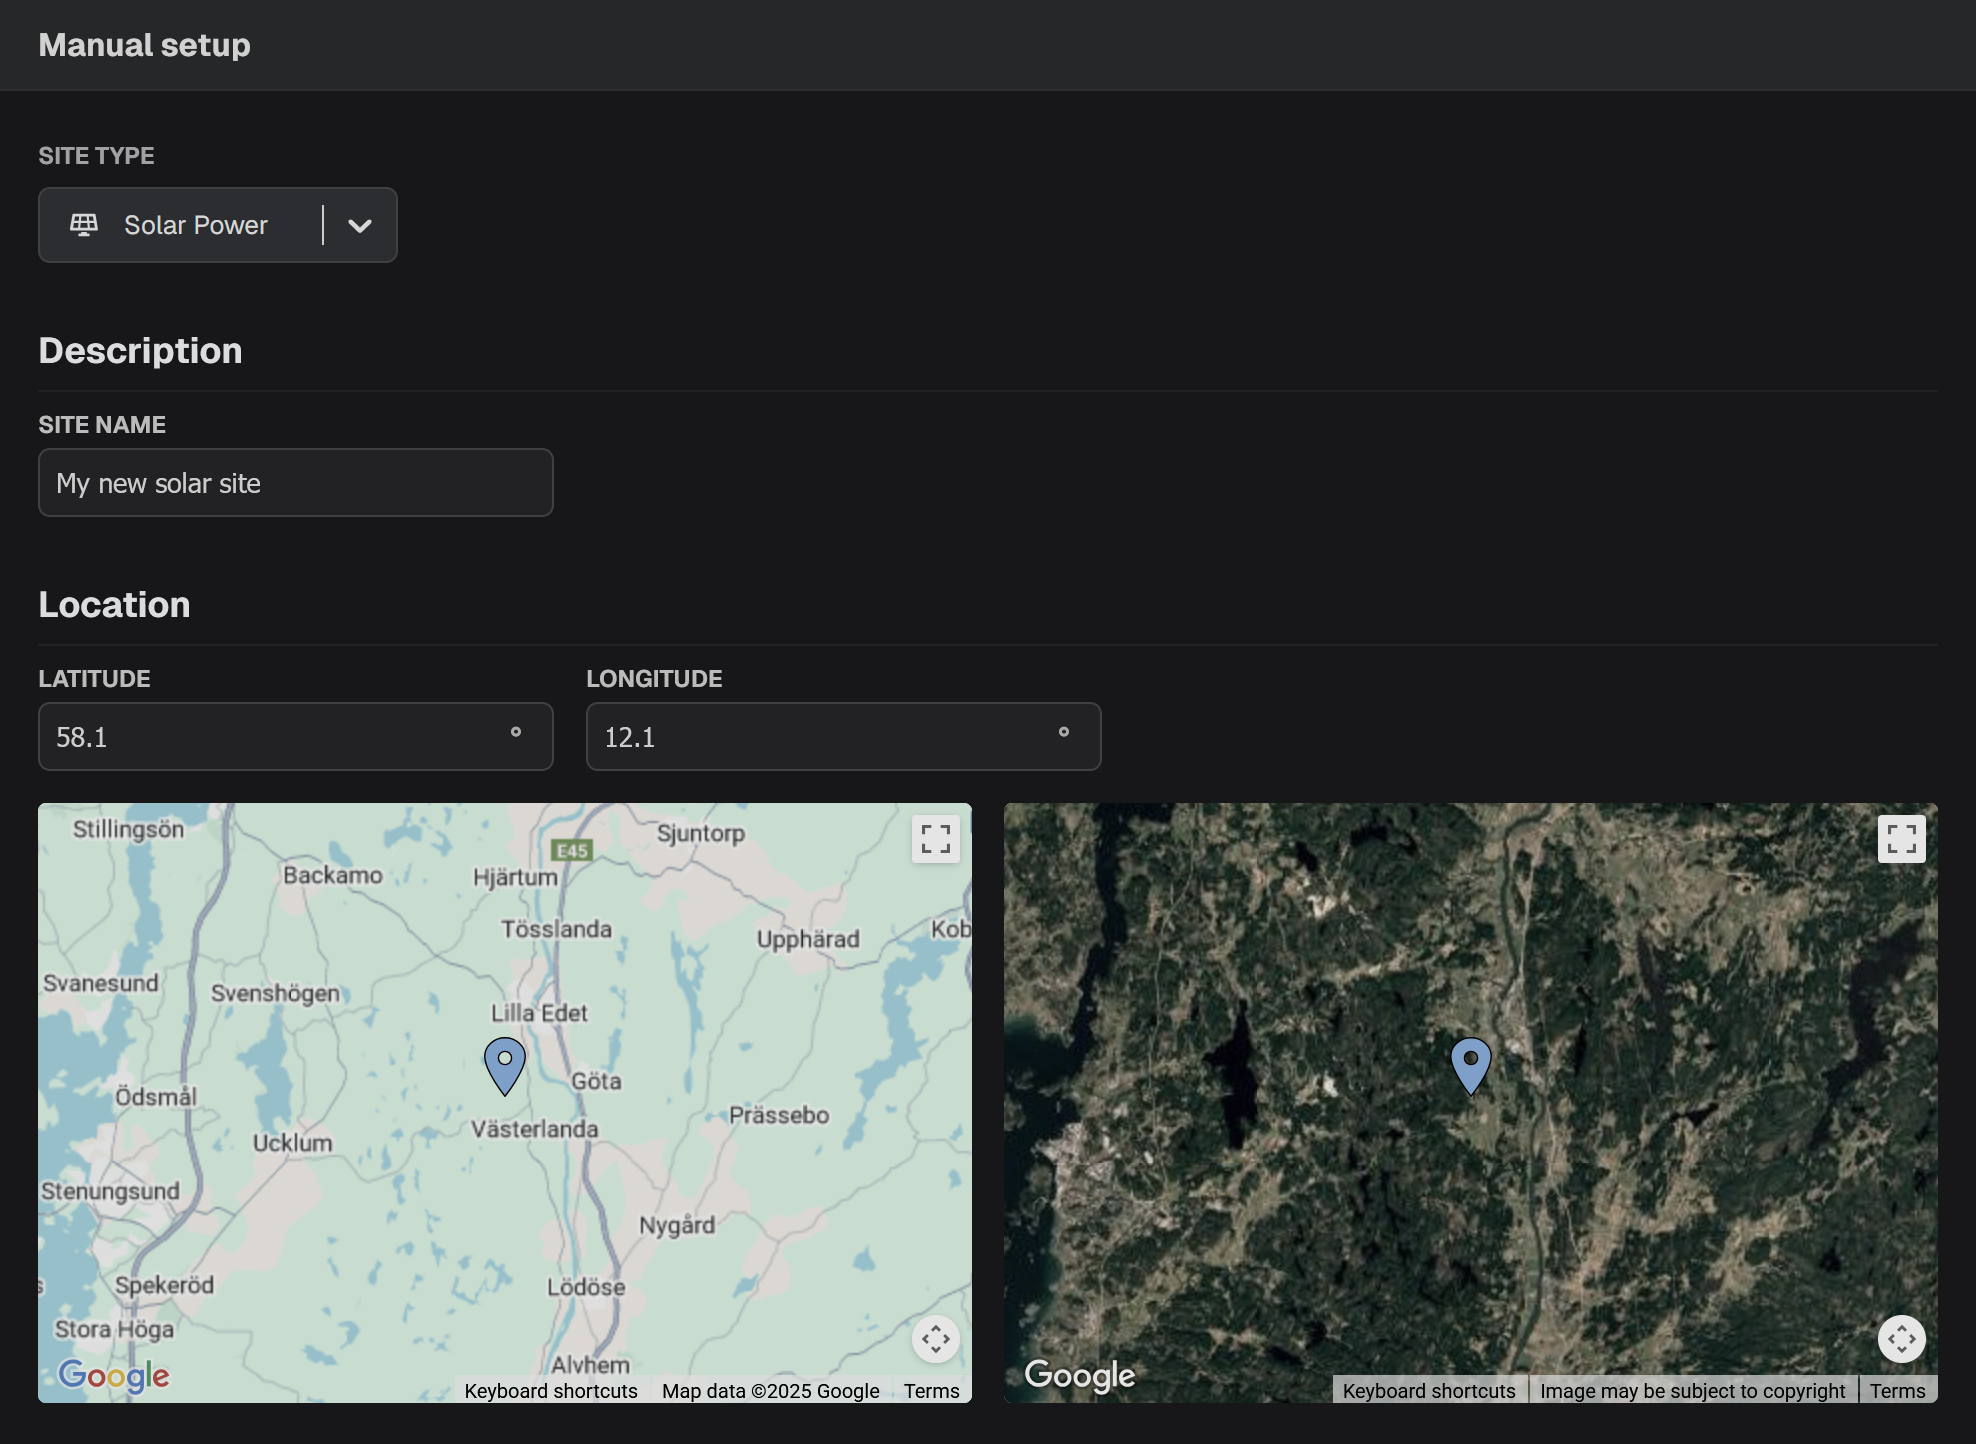 To create a PV power forecast, select **Solar Power** in the drop-down list. Continue by adding a name to the site and setting the location.
This is done by adding the latitude and longitude of the location. You can use the map to check if the location is correct.
#### Set PV system parameters
To create a PV power forecast, select **Solar Power** in the drop-down list. Continue by adding a name to the site and setting the location.
This is done by adding the latitude and longitude of the location. You can use the map to check if the location is correct.
#### Set PV system parameters
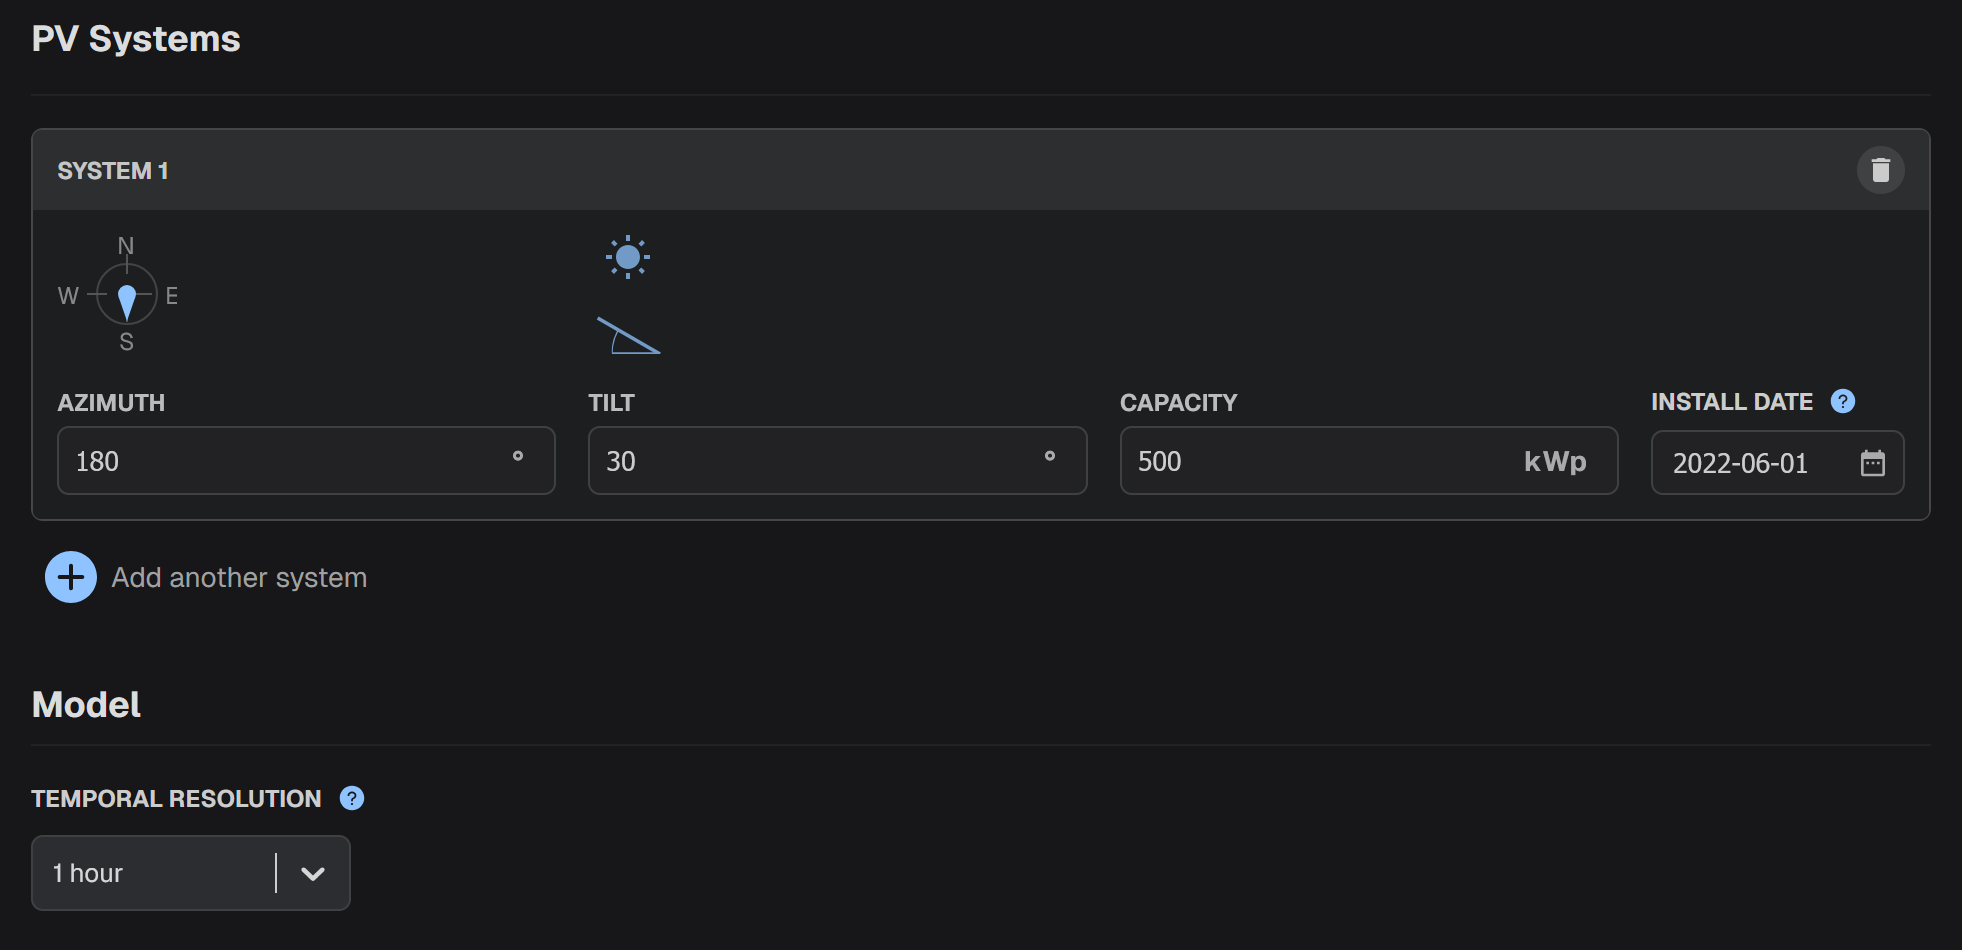 You need to specify the values of the following PV system parameters.
* **Azimuth**: the orientation of the PV panels. It should be in degree values between 0 and 360 (0-North, 90-East, 180-South, 270-West).
* **Tilt**: the inclination of the PV panels. It should be in degree values between 0 and 90 (0-parallel, 90-perpendicular to ground).
* **Capacity**: the capacity of the solar park in kilowatts (kW).
* **Install date**: the date when the system was installed.
It is possible to add more PV systems by choosing **Add another system**.
In that case, the power forecast will be corresponding to the total power generation of all the PV systems.
This is useful for PV systems with multi-orientation or multi-inclination panels. For such PV systems, a new system with the corresponding capacity should be added for every inclination or orientation.
Finally, you need to select the temporal resolution of the forecasts. There are four (4) options: **15 min**, **30 min**, **1 hour** and **1 Day**.
#### Advanced settings
You need to specify the values of the following PV system parameters.
* **Azimuth**: the orientation of the PV panels. It should be in degree values between 0 and 360 (0-North, 90-East, 180-South, 270-West).
* **Tilt**: the inclination of the PV panels. It should be in degree values between 0 and 90 (0-parallel, 90-perpendicular to ground).
* **Capacity**: the capacity of the solar park in kilowatts (kW).
* **Install date**: the date when the system was installed.
It is possible to add more PV systems by choosing **Add another system**.
In that case, the power forecast will be corresponding to the total power generation of all the PV systems.
This is useful for PV systems with multi-orientation or multi-inclination panels. For such PV systems, a new system with the corresponding capacity should be added for every inclination or orientation.
Finally, you need to select the temporal resolution of the forecasts. There are four (4) options: **15 min**, **30 min**, **1 hour** and **1 Day**.
#### Advanced settings
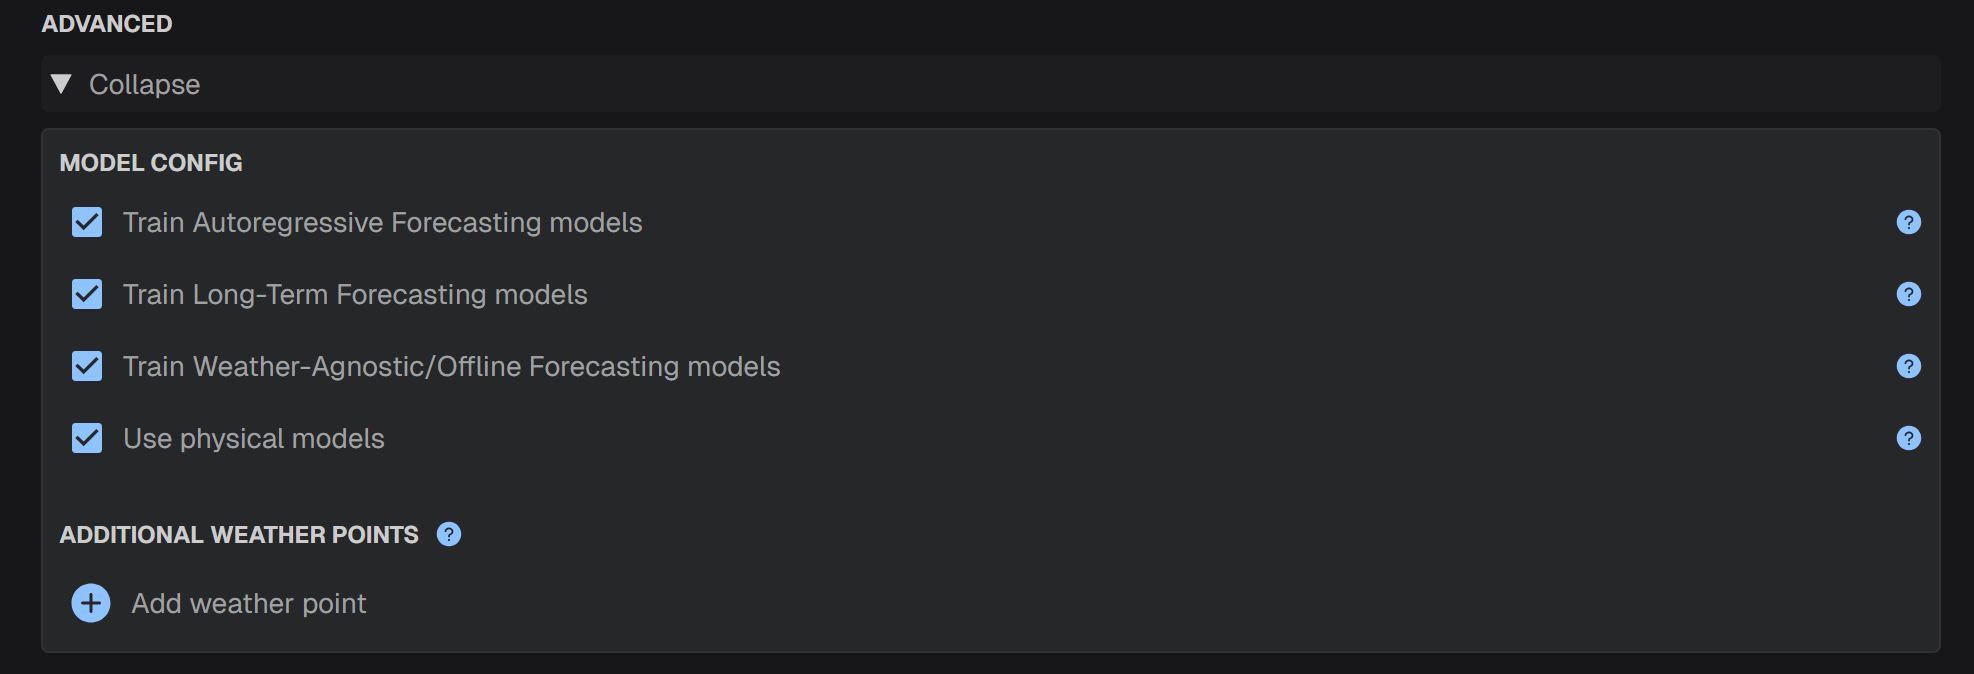 You can choose to enable or disable special forecasting models.
* **Train Autoregressive Forecasting models**: If checked, a model based on recent power observations will be trained for short-term forecasting. Power observations should be available in real time.
* **Train Long-Term Forecasting models**: If checked, a model based on typical meteorological year will be trained for long-term forecasting.
* **Train Weather-Agnostic/Offline Forecasting models**: If checked, a model that does not include any weather features will be trained.
* **Use physical models**: If checked, physical forecasting models will be deployed. No training data are required for physical models to work.
**Add additional weather points**: By choosing **Add weather point** you can assign additional locations. This is useful for solar power forecasting in a greater area.
#### Set name and location
You can choose to enable or disable special forecasting models.
* **Train Autoregressive Forecasting models**: If checked, a model based on recent power observations will be trained for short-term forecasting. Power observations should be available in real time.
* **Train Long-Term Forecasting models**: If checked, a model based on typical meteorological year will be trained for long-term forecasting.
* **Train Weather-Agnostic/Offline Forecasting models**: If checked, a model that does not include any weather features will be trained.
* **Use physical models**: If checked, physical forecasting models will be deployed. No training data are required for physical models to work.
**Add additional weather points**: By choosing **Add weather point** you can assign additional locations. This is useful for solar power forecasting in a greater area.
#### Set name and location
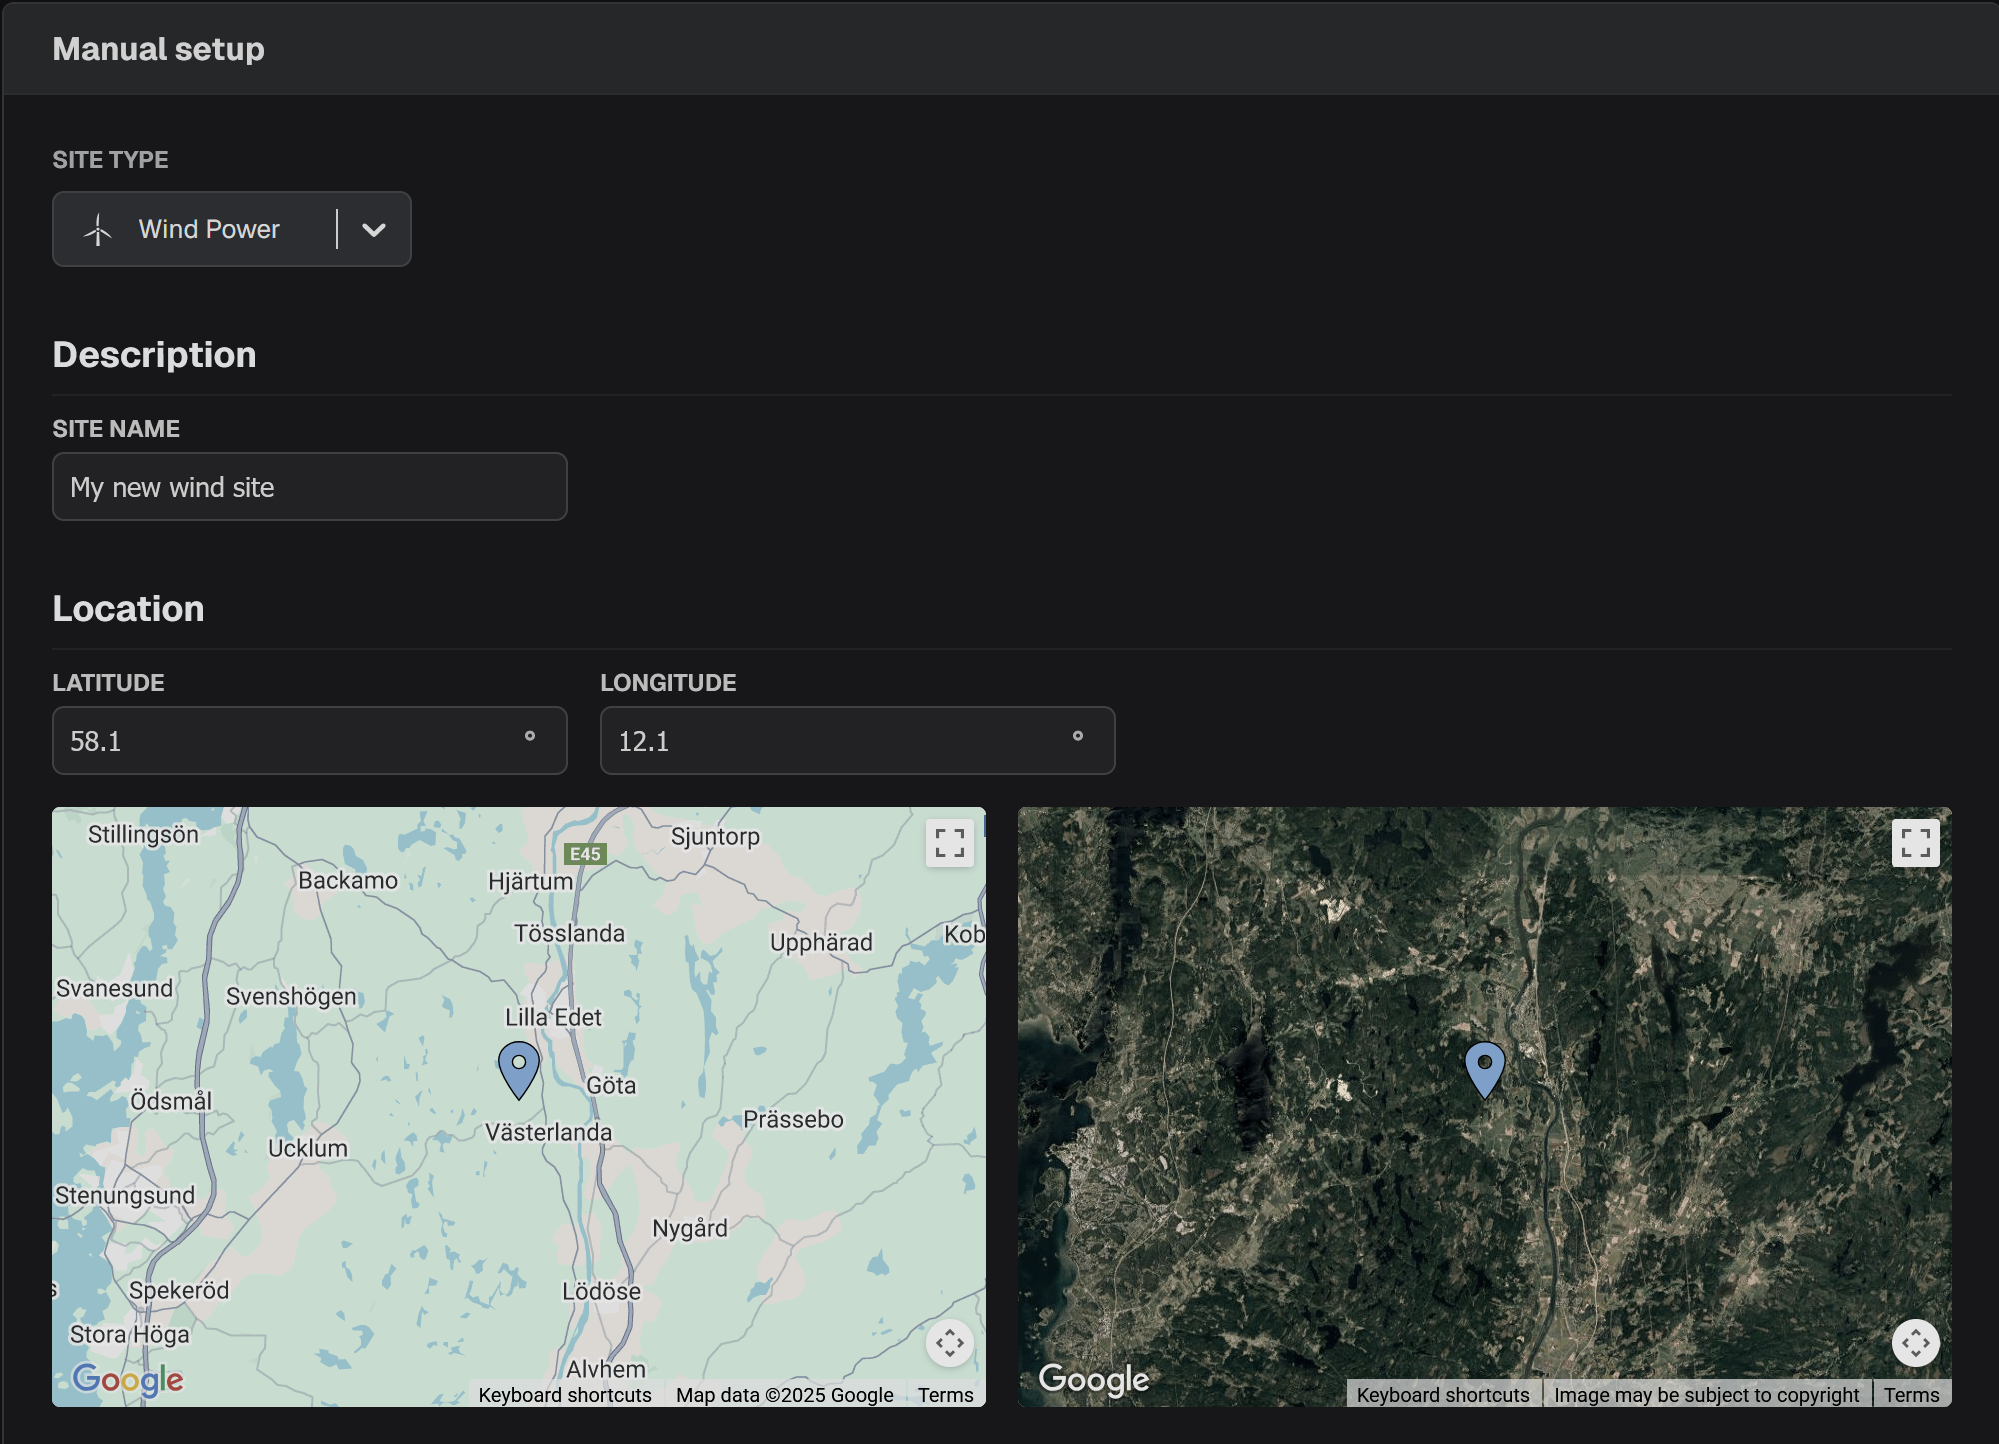 To create a wind power forecast, select **Wind Power** in the drop-down list. Continue by adding a name to the site and setting the location.
This is done by adding the latitude and longitude of the location. You can use the map to check if the location is correct.
#### Set wind power system parameters
To create a wind power forecast, select **Wind Power** in the drop-down list. Continue by adding a name to the site and setting the location.
This is done by adding the latitude and longitude of the location. You can use the map to check if the location is correct.
#### Set wind power system parameters
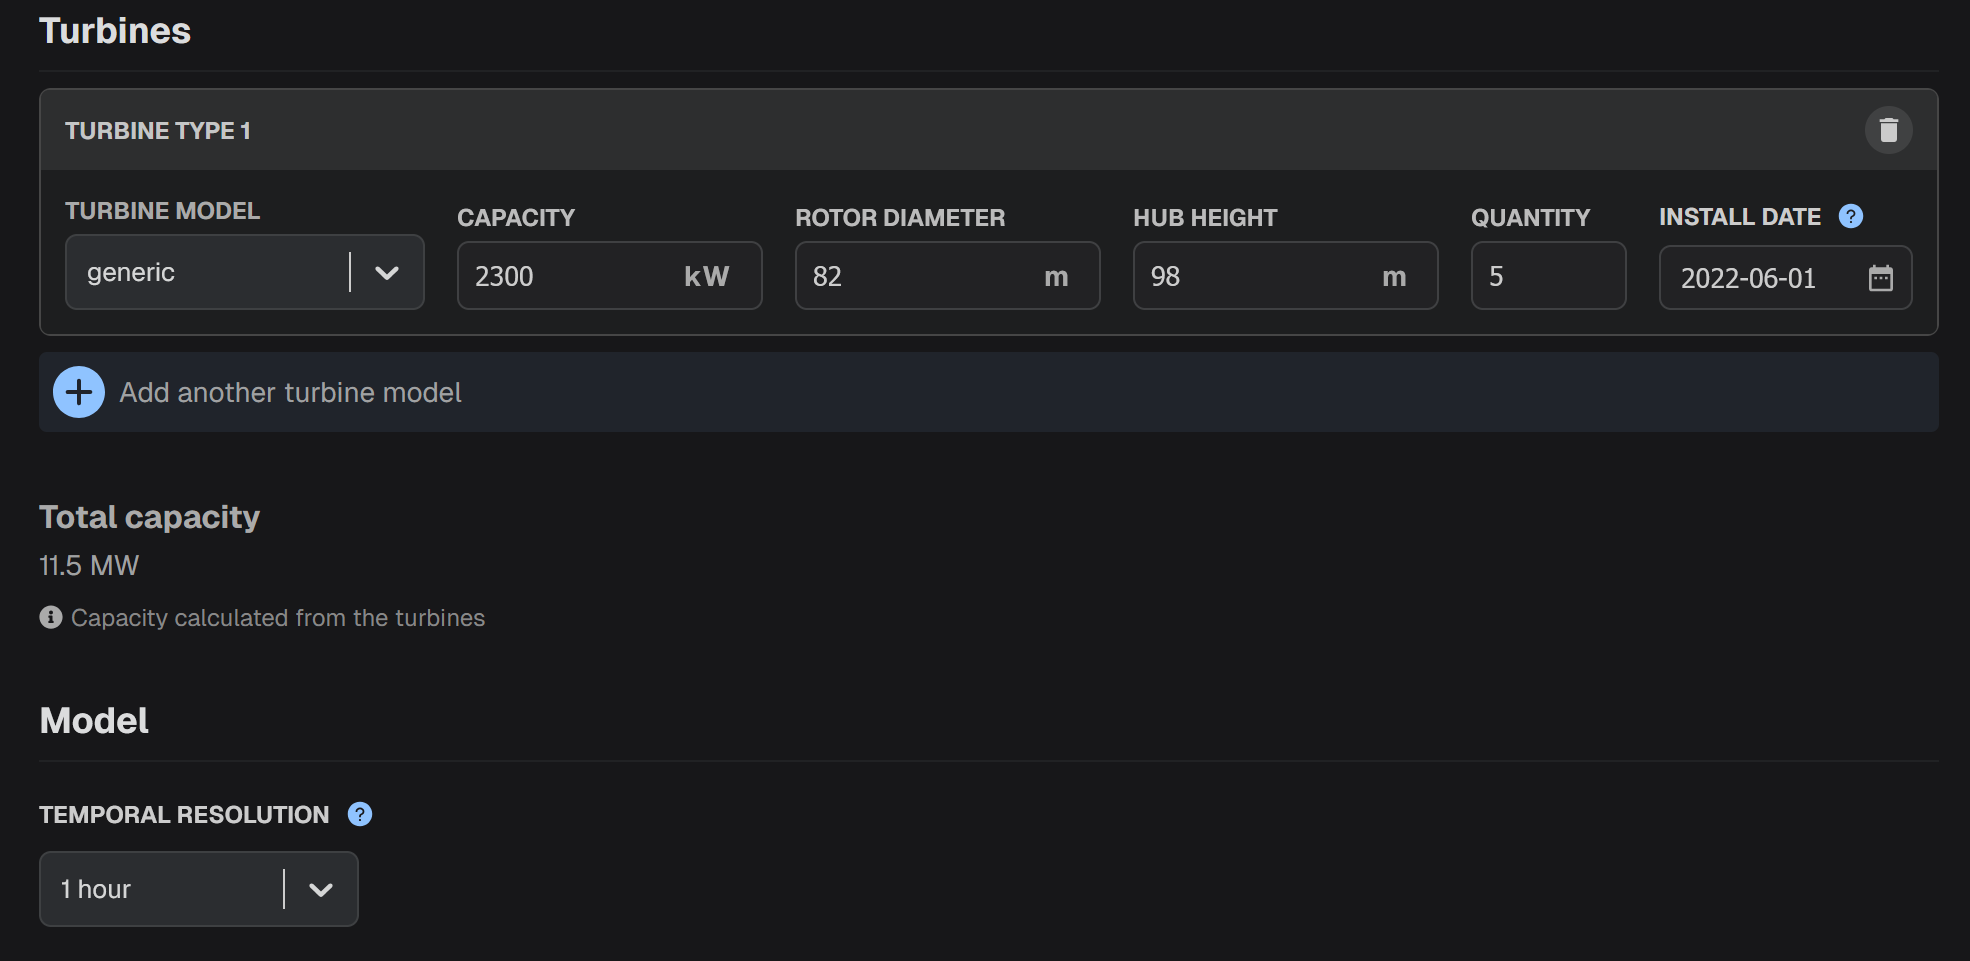 You need to specify the values of the following wind power system parameters.
* **Turbine model**: the model of the wind power turbines. There is drop-down list with all available models. If your model is not in the list, you can either choose a model with similar characteristics or pick **generic**.
If there are multiple wind turbine models use the **Add another turbine model** button to add them.
* **Hub height**: the height of the turbine hub in meters (m).
* **Quantity**: the number of the turbines.
* **Install date**: the date when the system was installed.
The following parameters are only needed for the **generic** turbine model:
* **Capacity**: the capacity of the wind turbine in kilowatts (kW).
* **Rotor diameter**: the diameter of the turbine rotor in meters (m).
Finally, you need to select the temporal resolution of the forecasts. There are four (4) options: **15 min**, **30 min**, **1 hour** and **1 Day**.
#### Advanced settings
You need to specify the values of the following wind power system parameters.
* **Turbine model**: the model of the wind power turbines. There is drop-down list with all available models. If your model is not in the list, you can either choose a model with similar characteristics or pick **generic**.
If there are multiple wind turbine models use the **Add another turbine model** button to add them.
* **Hub height**: the height of the turbine hub in meters (m).
* **Quantity**: the number of the turbines.
* **Install date**: the date when the system was installed.
The following parameters are only needed for the **generic** turbine model:
* **Capacity**: the capacity of the wind turbine in kilowatts (kW).
* **Rotor diameter**: the diameter of the turbine rotor in meters (m).
Finally, you need to select the temporal resolution of the forecasts. There are four (4) options: **15 min**, **30 min**, **1 hour** and **1 Day**.
#### Advanced settings
 You can choose to enable or disable special forecasting models.
* **Train Autoregressive Forecasting models**: If checked, a model based on recent power observations will be trained for short-term forecasting. Power observations should be available in real time.
* **Train Long-Term Forecasting models**: If checked, a model based on typical meteorological year will be trained for long-term forecasting.
* **Train Weather-Agnostic/Offline Forecasting models**: If checked, a model that does not include any weather features will be trained.
* **Use physical models**: If checked, physical forecasting models will be deployed. No training data are required for physical models to work.
**Add additional weather points**: By choosing **Add weather point** you can assign additional locations. This is useful for wind power forecasting in a greater area.
#### Set name and location
You can choose to enable or disable special forecasting models.
* **Train Autoregressive Forecasting models**: If checked, a model based on recent power observations will be trained for short-term forecasting. Power observations should be available in real time.
* **Train Long-Term Forecasting models**: If checked, a model based on typical meteorological year will be trained for long-term forecasting.
* **Train Weather-Agnostic/Offline Forecasting models**: If checked, a model that does not include any weather features will be trained.
* **Use physical models**: If checked, physical forecasting models will be deployed. No training data are required for physical models to work.
**Add additional weather points**: By choosing **Add weather point** you can assign additional locations. This is useful for wind power forecasting in a greater area.
#### Set name and location
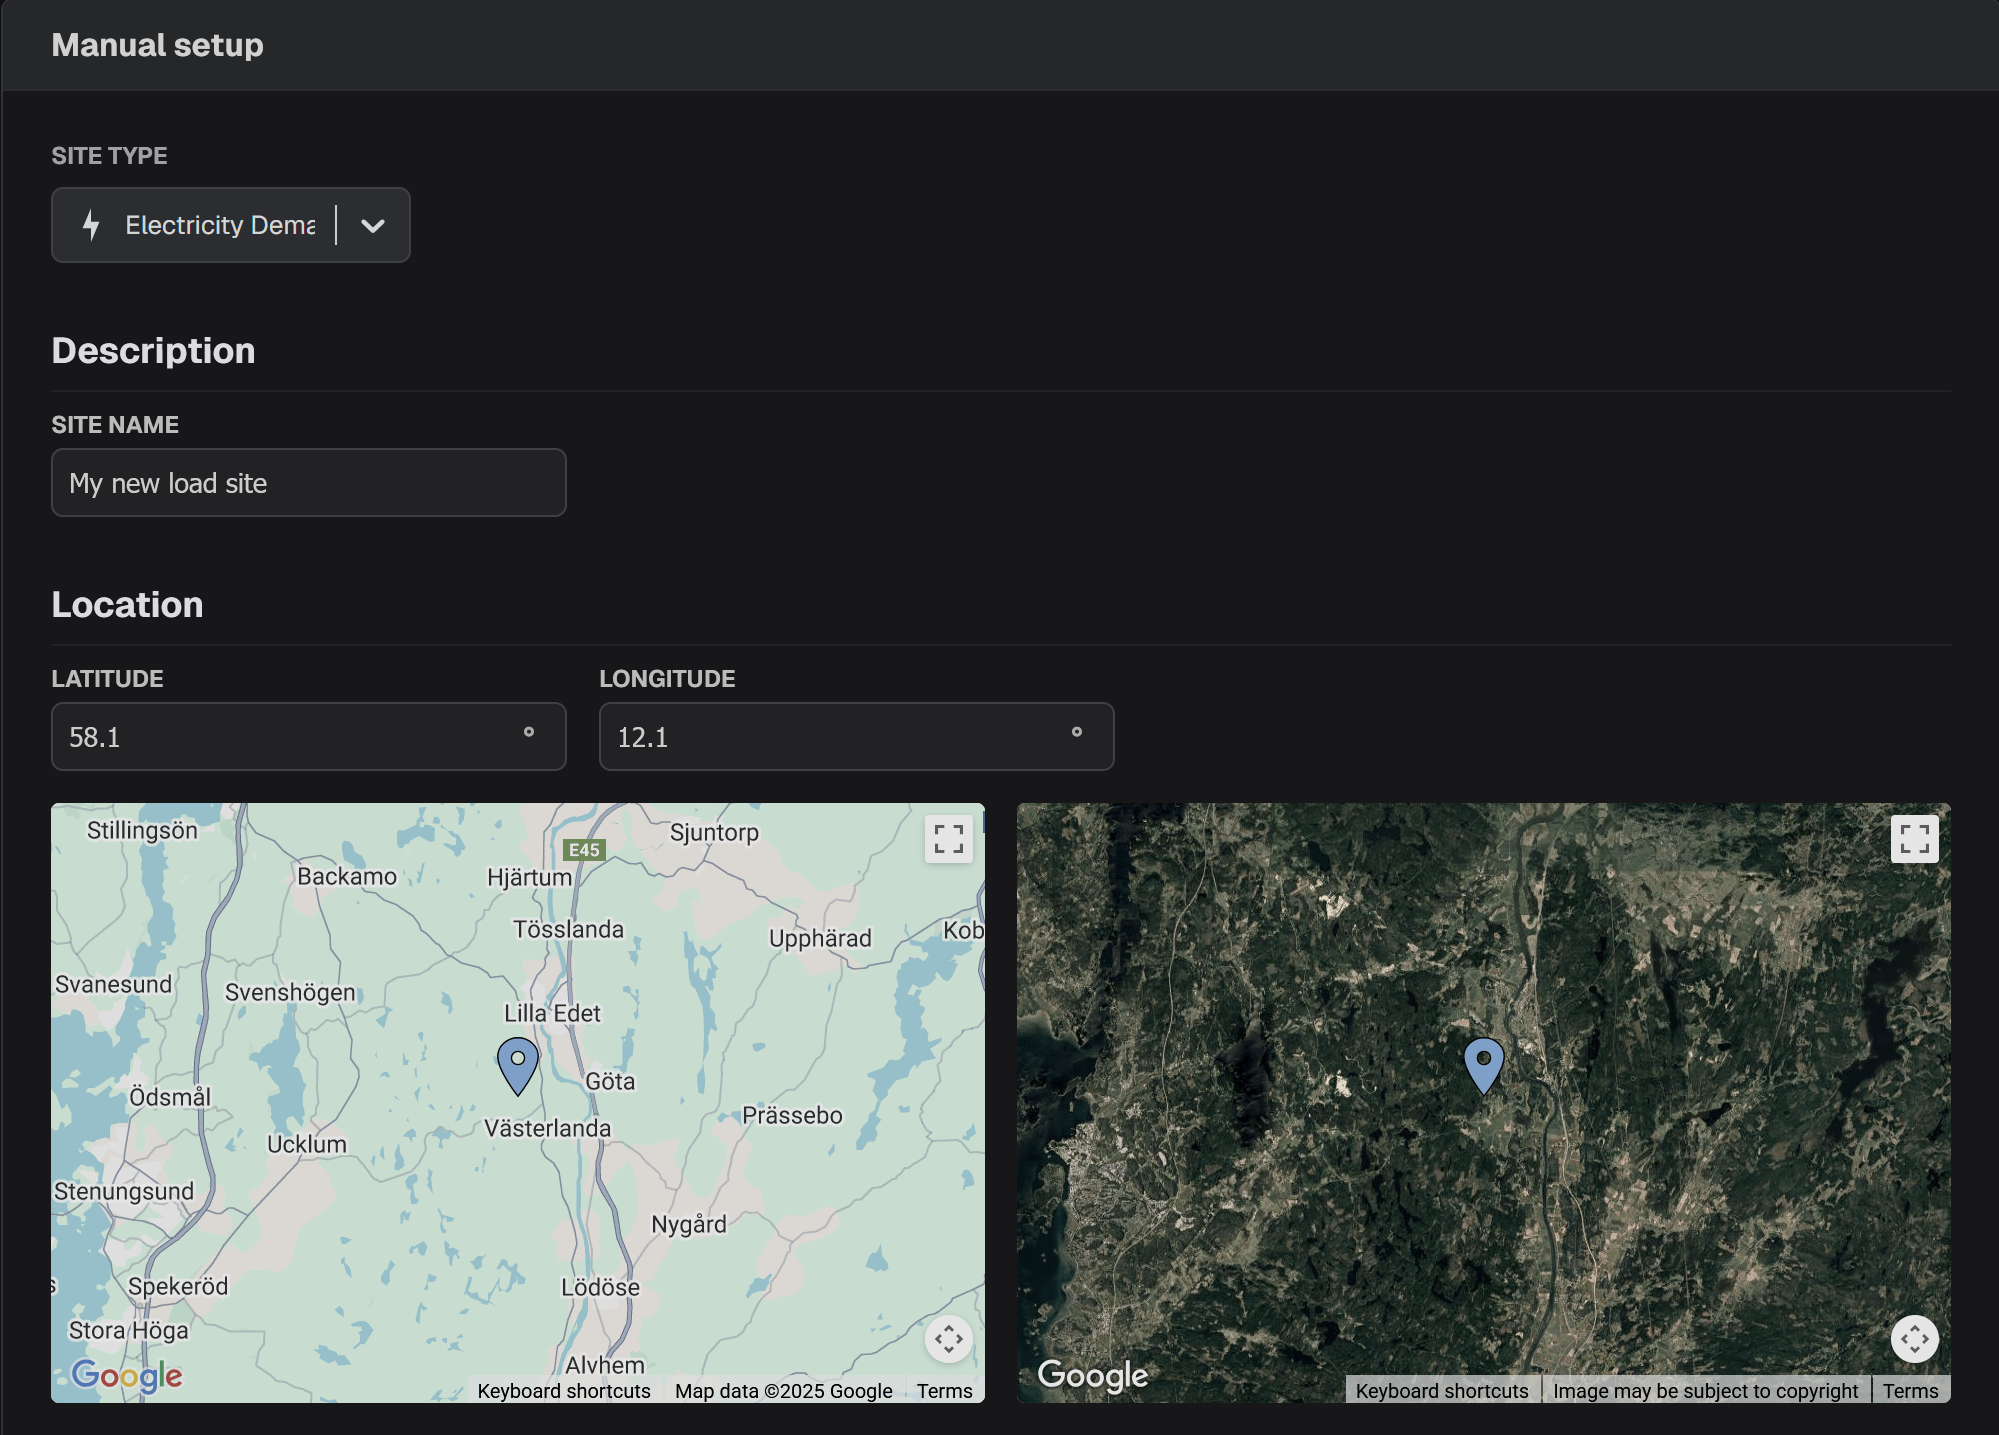 To create an electricity demand (load) forecast, select **Electricity Demand** in the drop-down list. Continue by adding a name to the site and setting the location.
This is done by adding the latitude and longitude of the location. You can use the map to check if the location is correct.
#### Set temporal resolution
To create an electricity demand (load) forecast, select **Electricity Demand** in the drop-down list. Continue by adding a name to the site and setting the location.
This is done by adding the latitude and longitude of the location. You can use the map to check if the location is correct.
#### Set temporal resolution
 You need to select the temporal resolution of the forecasts. There are four (4) options: **15 min**, **30 min**, **1 hour** and **1 Day**.
#### Advanced settings
You need to select the temporal resolution of the forecasts. There are four (4) options: **15 min**, **30 min**, **1 hour** and **1 Day**.
#### Advanced settings
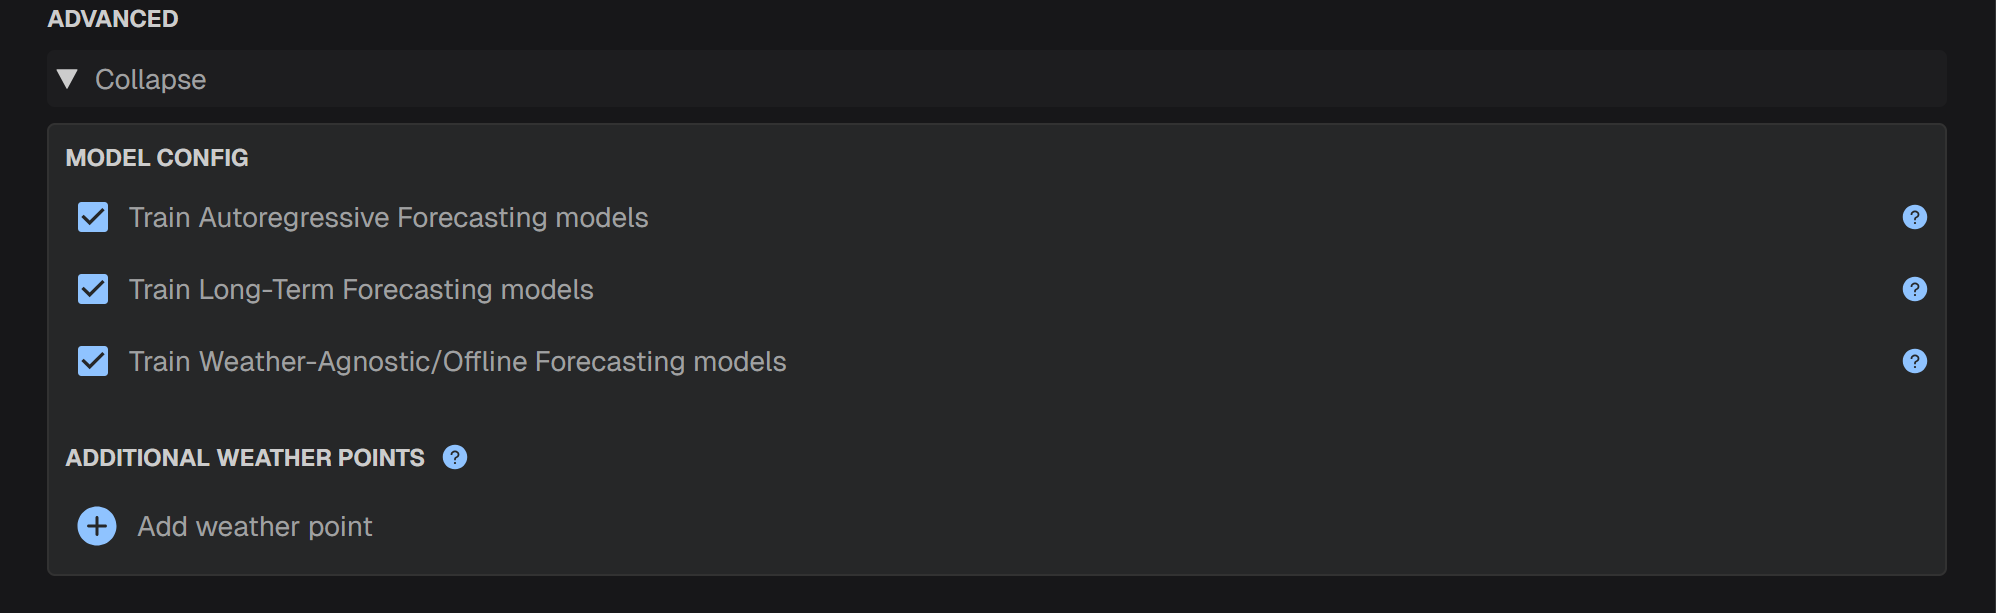 You can choose to enable or disable special forecasting models.
* **Train Autoregressive Forecasting models**: If checked, a model based on recent electricity demand observations will be trained for short-term forecasting. Electricity demand observations should be available in real time.
* **Train Long-Term Forecasting models**: If checked, a model based on typical meteorological year will be trained for long-term forecasting.
* **Train Weather-Agnostic/Offline Forecasting models**: If checked, a model that does not include any weather features will be trained.
**Add additional weather points**: By choosing **Add weather point** you can assign additional locations. This is useful for electricity demand forecasting in a greater area. For example, you can set the coordinates of the major cities in the area.
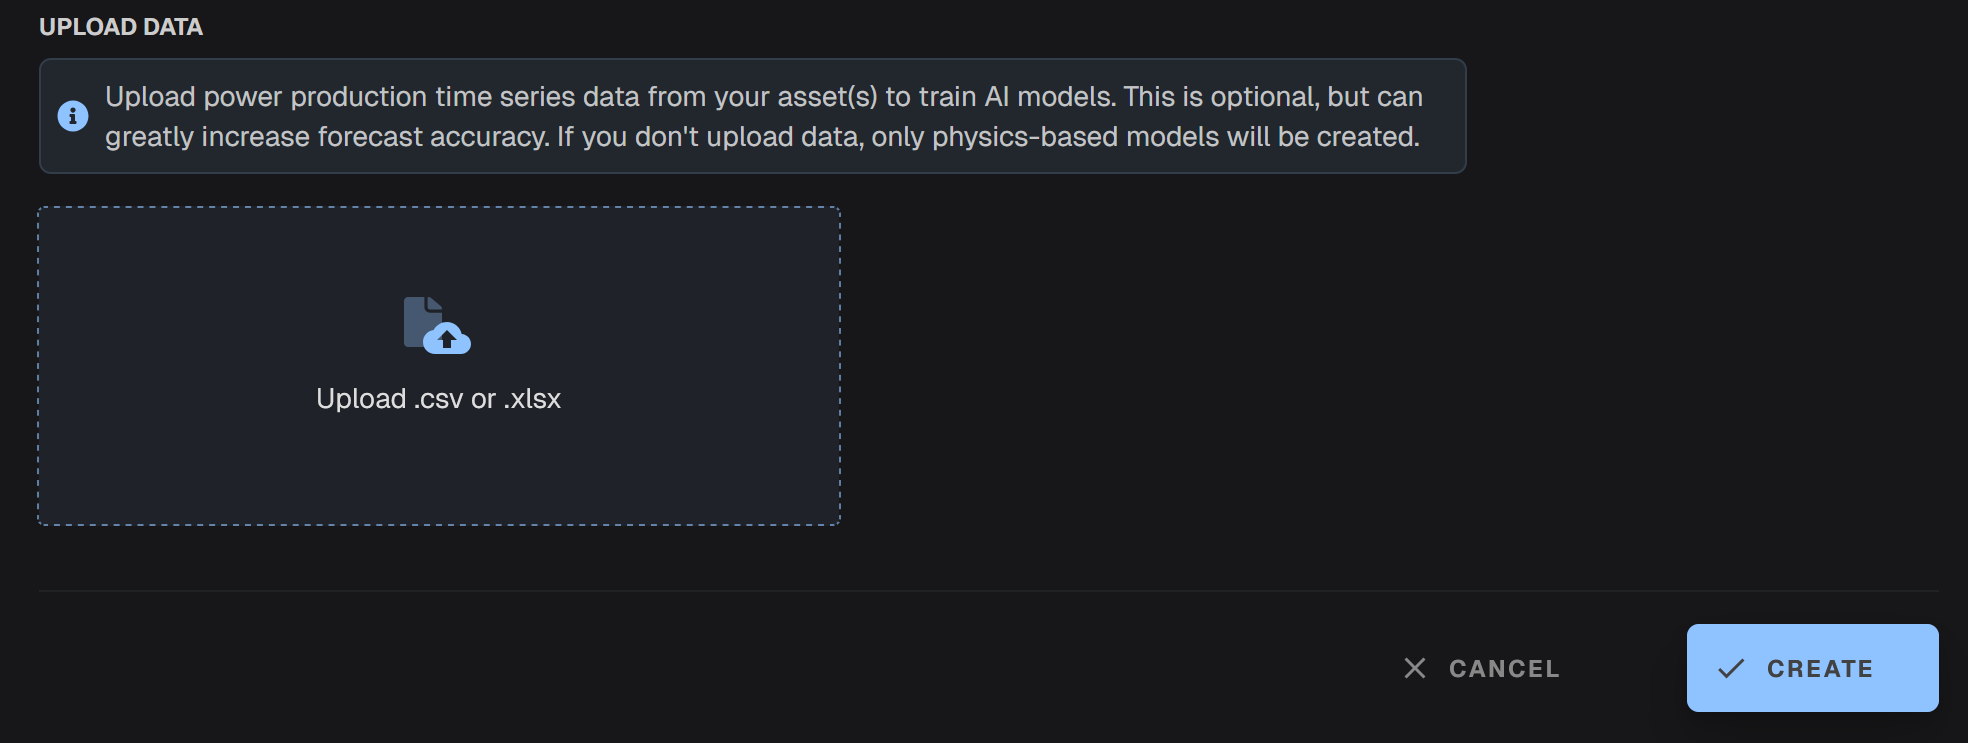
### Step 4. Upload power measurements
Upload historical generation or demand data to train ML models. For wind or solar sites this is an optional step. If no power generation data are uploaded, then only physical models can be deployed.
For better performance of the ML models, the power measurements are recommended to have hourly or sub-hourly resolution. The platform accepts csv or xlsx files. [Find templates](https://drive.google.com/drive/folders/1T_Mgs3sGqxwmAy0kmFFtHQI_wJ9rVPmt).
You can choose to enable or disable special forecasting models.
* **Train Autoregressive Forecasting models**: If checked, a model based on recent electricity demand observations will be trained for short-term forecasting. Electricity demand observations should be available in real time.
* **Train Long-Term Forecasting models**: If checked, a model based on typical meteorological year will be trained for long-term forecasting.
* **Train Weather-Agnostic/Offline Forecasting models**: If checked, a model that does not include any weather features will be trained.
**Add additional weather points**: By choosing **Add weather point** you can assign additional locations. This is useful for electricity demand forecasting in a greater area. For example, you can set the coordinates of the major cities in the area.
### Step 4. Upload power measurements
Upload historical generation or demand data to train ML models. For wind or solar sites this is an optional step. If no power generation data are uploaded, then only physical models can be deployed.
For better performance of the ML models, the power measurements are recommended to have hourly or sub-hourly resolution. The platform accepts csv or xlsx files. [Find templates](https://drive.google.com/drive/folders/1T_Mgs3sGqxwmAy0kmFFtHQI_wJ9rVPmt).